Category Archives: garden

New Years Permaculture Update

Here are some pictures of our pumping permaculture property.

Good eats
A lettuce crop where I harvested garlic just 2 weeks ago. 
More on the vine
Bawberries, as Verti would say.
Looking forward to our first grapes this year.
Mo bawberries pwees.
Pumpkins forming.
Another cubic metre of compost.
Spuds in the ground.
“Wild” purslane.
Kittens next door.
A little colour.
Bean blossoms.
Bean blossoms.
Bean blossoms… fooled you. Apples.
Plums.
Baspberries.
Melons in the ground. Hopefully it will be hot enough for fruits to form. 
Red hot chilly peppers – blossoming.
Our first oranges.
Guava fruits forming from fertilized flowers.
Dinner tonight.
Dinner tonight.

Peace, Estwing

Swales and Rain Gardens for Water Management

It is encouraging to see the number of people engaging in meaningful dialogue about important local issues through the Letters page of the Chronicle. Sadly, too often these letters include references to failed attempts to work with Wanganui District Council on strategies that work with nature instead of against it.
For some reason, our Council appears stuck in the past on many issues of infrastructure and economic development. From most accounts, the 1950s were a great time to be alive, but in many cases ‘50s thinking no longer applies.
All of this makes it particularly significant that WDC Chief Water Engineer, Kritzo Venter, has been active and vocal about promoting progressive water management strategies that ‘mimic’ those that nature itself has developed over millions of years. (That is some investment in R&D, ain’t it?!?)
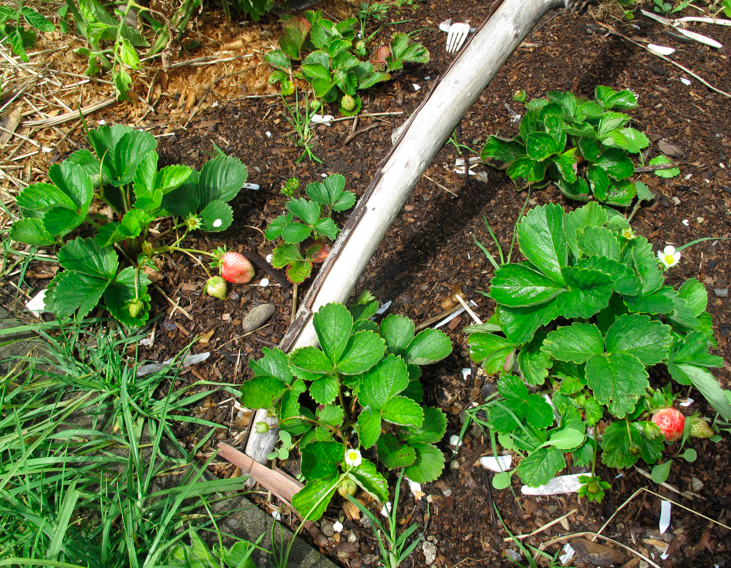
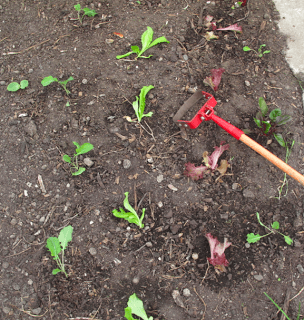
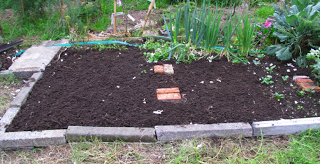
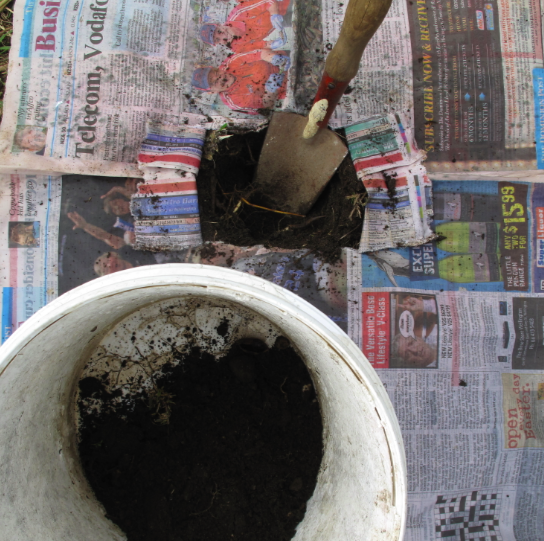
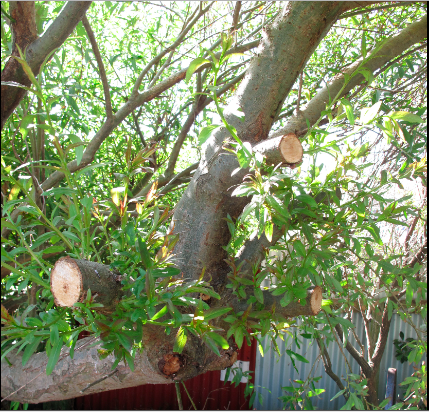
Small swale and rain garden. 
One of those water management strategies – swales – has been in use for decades in some places around the world. A swale is a long, narrow earthwork that runs perpendicular to slope. They slow the flow of surface runoff and facilitate infiltration into the ground. They are perfectly level, unlike ditches, which are sloped to drain water away like a river. Water in a swale soaks into the ground instead of running over it. A carefully constructed swale includes a level-sill spillway that gently allows it to be overtopped in a controlled manner in the event of extreme rain.
The use of swales is the type of win-win-win situation I write about in this column because it: 1) reduces stream and river levels during flood events; 2) increases groundwater reserves that can be called upon during periods of drought; and, 3) significantly reduces the overall cost of infrastructure. Eco-thrifty at its best.
For example, two years ago I was asked to consult on a proposed residential development in Kaiwhaiki that had significant drainage problems. I was told the 10-year-old quote to ‘solve’ the problem the ‘old way’ using pipes and culverts was for half a million dollars. After picking my jaw up off the floor, I told them that good eco-design, which would include cluster housing and the use of swales, would significantly slash that price. WDC Chief Planner, Jonathan Barrett, appeared supportive of those ideas during one meeting held at Council.
The other strategy promoted by Kritzo – and praised by Chronicle assistant editor, Anna Wallis – is the use of rain gardens. A common use of rain gardens is to absorb and filter runoff from new parking lots or other such impermeable surfaces. In this way, rain gardens function like wetlands: sponging up excess water and cleaning it through natural processes.
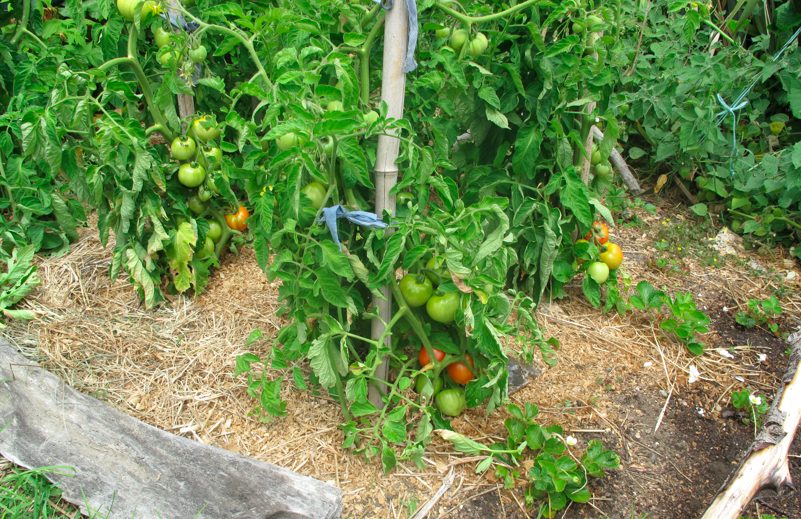
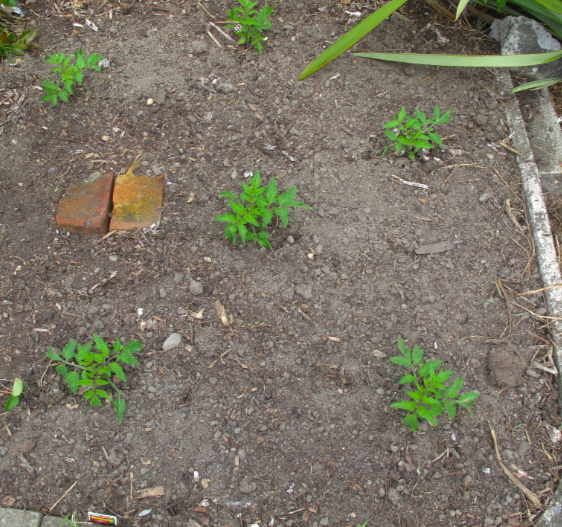
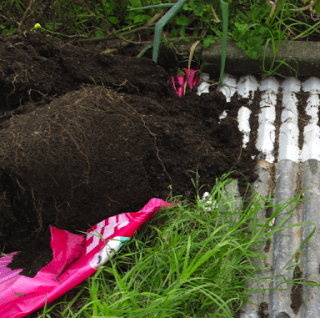
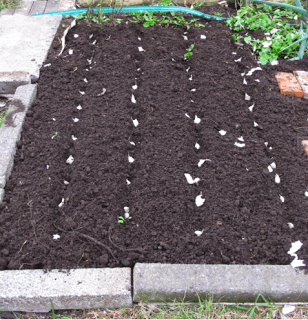
A series of mini-swales and vege gardens make up this garden.
I first learned about rain gardens in 2005 while taking a certificate programme in the States on Organic Land Care. Shortly thereafter I advised a school to install rain gardens in a number of locations where they had persistent drainage problems. This was particularly meaningful in the context of the school because it became a relevant learning experience for students.
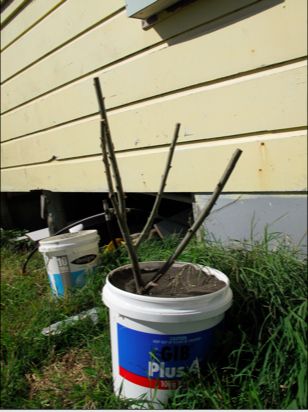
In 2009, while living in Raglan, I built a small management system to control an excess of runoff coming from the roof of a newly built outdoor kitchen at a campground. The system consisted of a swale, a level-sill spillway, and a rain garden. We planted the swale with feijoa trees and the rain garden with plants that tolerate periods of wet and dry.
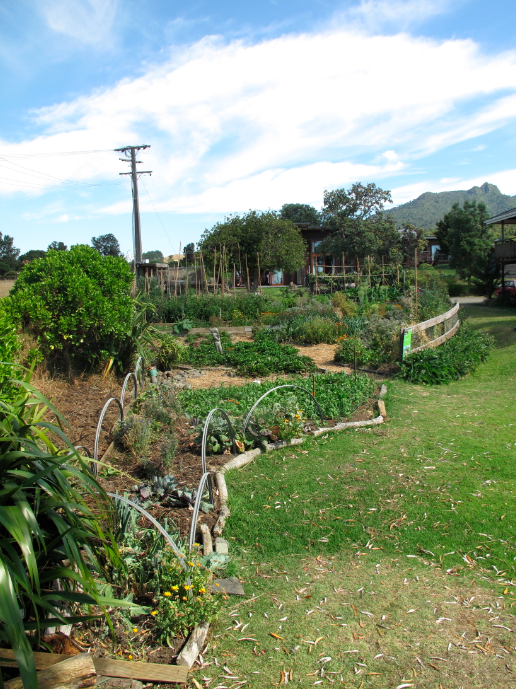
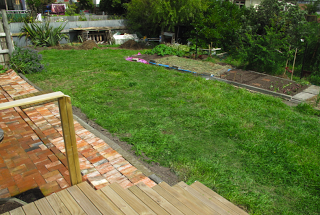
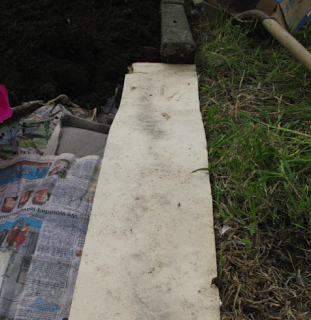
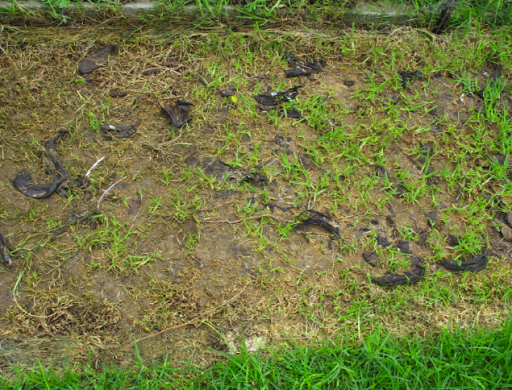
Swales and vege gardens soak up water and keep it from flooding this lawn.
While in Raglan, I also used swales as a metaphor for eco-design during a Pecha Kucha night, where artists and designers share their work through 20 slides with narration of 20 seconds per slide. That presentation, “Thinking Like a Swale,” became the inspiration for a programme I offered at the Josephite Retreat Centre earlier this year to acknowledge the UN year of water. Hopefully, when River Week 2014 comes around next year, I’ll get a chance to present it again to compliment and support the education efforts Kritzo has already made in the community.
Us ‘swale-thinkers’ gotta stick together. It’s a watershed out there.

Making Small-Scale Vegetable Production Pay

Any small-scale organic farmer or market gardener knows it’s very hard to make anything more than a minimum wage unless one has unprecedented access to a population that is willing to pay fair prices for high quality food. Paradoxically, the land values near these population centres are extraordinarily high, basically preventing small-scale farming or market gardening.

For the rest of us, it is a hard slog for the moment. I have three pieces of advice for the aspiring market gardener who wishes to make a fair wage for their skills and time: 1) find a niche product; 2) be first to market with a common product; 3) grow the best of the best of anything.

Finding a niche product, however, can be hard so I’ll focus on the other two for the moment.

Last year I beat everyone to our local market with fresh, local, organic tomatoes by over three weeks. As such, I could charge a premium for being the first, and then drop out of the competition when everyone joined me and prices fell.

Being first to market means planting early varieties and getting them in the ground early.

It also means planting these early varieties in the hottest spots.

I would not call garlic a niche crop, but I will say that discriminating cooks will pay for the best garlic.

We will sell and give away about half, save a quarter to replant, and eat a quarter ourselves.

Peace, Estwing

Brains Not Brawn in the Garden

At the ECO School, we believe in making the highest quality sustainability education affordable. Money should never be a barrier to getting top notch information to people of moderate means, and delivering that information expertly by making it logical, practical, relevant, easy to understand, and teaching to multiple intelligences.
We reach the world through the Web, and we reach out in our community (and those communities where we are invited) by working with teachers in schools, presenting to community groups, running workshops and offering consulting services. Most of our local initiatives are payable 100% in REBS, our local currency, meaning anyone can join that network and attend a workshop “on credit” and “pay” for it later by offering their own talents to the REBS network. And on top of that, all of our workshops and consulting services are designed to help people save money. In most cases, the cost of the education pays for itself in a matter of months, and after that it is all savings. Compare that to the average US or NZ university degree!
By far our most popular and most successful workshop has been “Organic Weed Control: Human Scale Design and Management” aka, “Low-Maintenance / High-Productivity Gardening.” We’ve trained over 300 people over the last four years in Australia, USA and New Zealand with excellent feedback. We will be offering this workshop on Sunday, November 13th from 1 to 5 pm here on Arawa Place. Some aspects of the programme include:
• Designing garden beds with the mantra, “Tools, Timing, Technique.”
• Improving germination rates in chunky soils.

• Tips for transplanting, spacing, staking, propagating and pruning tomatoes.
• The judicial use of mulch, and growing great garlic and onions.

• Super lazy, super productive pumpkin patches.
• Eco-thrifty compost making. For more details, click here.
And while you’re here, check out the rest of or eco-thrifty landscaping…
… including our almost finished brick patio. (John and Amy, Come back and help us complete it!)
And, most importantly, someone tell me the name of this plant. It has a thick, perennial woody root but the foliage dies back in winter. It grows everywhere in our sandy section.

Pre-registration required. Contact us through the ECO School. As always, discounted rate for our neighbors in Castlecliff.
Peace, Estwing

Act Locally, Share Globally

I am a natural skeptic about new technology. I am not an “early adopter.” I am more Amish in my approach – carefully weighing the costs and benefits before choosing what is appropriate. The technologies we’ve chosen to embrace for this project have well-documented results for return-on-investment in terms of energy savings. Examples are insulation and solar hot water.
Education also embraces certain technologies. And naturally, I am skeptical about those as well. It took me years to appreciate the power of blogs and podcasts. But now I am sold on their educational value. One of my favorite podcasts is called Two Beers with Steve.
I have done a number of interviews with him in the past, but this one is designed to coincide with my do-dig garden series: Part 1, Part 2, Part 3.
While I remain skeptical about much of the use of the internet, I think it has been a great help to us sharing the success of this project with a world wide audience. Our goal is to demonstrate that being green is not expensive. On the contrary, not being green is expensive! We enjoy a high quality of life with very low energy and food bills, and we are actively involved in making our local community more sustainable. Some of our experiences may be considered useful by someone on the other side of the planet. The web allows us to share our story with them with a very low carbon footprint.
So as the environmental movement evolves, I propose the next stage of evolution involves acting locally and sharing globally. Governments and corporations won’t do it for us. We need to help one another learn how to be green and save some green.

Peace, Estwing

No-Dig (Part 3): Ground Preparation

In the first post of this No-Dig series I described how decompressing the soil with a garden fork is the first step of the process. While that’s true, there are some ways to prepare the site even before forking it over. Currently we are “tractoring” ducks…

…and chooks in areas where we plan to install beds. The fowl eat the grass and fertilize the future garden bed. Because we have two particularly aggressive grasses and other invasive weeds, it is important for us to knock them back before putting in new beds.

After the birds have done their job, the former lawn looks something like this. (Note the banana peels. We get “baking bananas” for $2 a box from a local veggie shop. We eat some and feed some to the ladies.)
But you may not have birds or even want them. Or maybe your municipality is even silly enough to outlaw them. Other techniques I’ve used include covering the ground with black plastic for extended periods of time (1 month to 4 months). Because plastic is UV sensitive, I extend its useful lifetime by covering the plastic with weeds. This serves multiple purposes. Along with making the poly sheets last longer, it is a way to dry out the weeds for later use as mulch and it looks much more attractive than a sheet of plastic laying in the yard.
And finally, to continue the local, abundant and free theme from the two previous posts, we happen to have heaps of roofing iron on our section. We use it to knock back aggressive grasses and weeds before bed building. Just make sure you weigh it down to protect against gusting winds.


Referring back to the first post in this series once again, the bed that I built on the solstice started out looking like this.


The iron had been there for about 3 months and the pile of topsoil on top of the Pink Batts plastic had been there for about a month. Although you can see a little bit of cacuya grass between them, I pulled that foliage off before placing an extra thick layer of newspapers there.
And in no time 100 garlic were in the ground.
An easy no-dig installation should be part of an easy, low-maintenance/high-productivity management system. And the key to that, in my decade plus of experience, is managing weeds. Two important parts of easy weed management are never stepping in the beds (see #1 in this series) and building in low maintenance edges (see #1 in this series).
I have run many workshops in 3 different countries on low-maintenance/high-productivity organic management. If you would like to host one in your area, please contact us. If you are a publisher, this management system is waiting for a book deal.
It is a great time to be building beds in both the Southern and Northern Hemispheres. Get on to it!

Peace, Estwing

No Dig (Part 2): Pocket Garden

This is a technique I developed a few years ago that is fast, inexpensive and attractive. The materials you need are: wet newspapers, a trowel, a bucket of compost, an empty bucket, seedlings, and a bale of hay/straw.
Step 1: Lay out newspaper on the lawn as explained in the previous post, and cut a capital H in the wet newspaper with the trowel.
Or a capital I if you prefer.
Step 2: Fold back the paper like opening French doors.
And dig out the sod and soil to the volume of a 1 litre/quart yogurt container. Carefully put the soil into the empty bucket so as not to allow weed seeds in the soil on top of the newspaper.

Step 3: Fill the 1 litre/quart hole with compost.
Step 4: Plant the seedling, water thoroughly, and fold back the newspaper.
Step 5: Mulch with hay or straw.
* Note that we don’t buy in hay or straw because we use tall grasses that we cut with a scythe and harvest with a rake. I have used wood chips as a mulch on one job, but that was only as a very low-budget approach in that particular case.
With a stack of newspapers and a few bales of hay/straw you could convert an entire lawn to garden in a weekend.

Peace, Estwing

No-Dig Garden Beds (Part 1)

I’m told that in the land of the long white cloud (Aotearoa/NZ) garlic is planted on the shortest day of the year and harvested on the longest. Fair enough. That’s more or less what we’ve done for the past two years. But last week I managed to land right on the 21st. It was a beautiful day and I spent a couple of hours building a new garden bed, taking pictures, planting garlic and missing an afternoon meeting that slipped my mind. Oops.

Even though it is the middle of winter here and the middle of summer in the northern hemisphere, it is still a fine time to put in a garden bed. On my farm in New Hampshire, I remained seeding fall greens (spinach, kale, Swiss chard) through the second week in August. If you have a small garden and want to expand it, or you want to start a garden on your lawn, here are a few things I’ve learned over the last 12 years of building beds.
* Please note that we use a number of techniques to prepare the plot before putting in a new bed, but those are not required. It is quick and easy to go from lawn to garden in one afternoon. I’ll explain those prep techniques in another post.
Step 1: Decompress the soil. Assuming you’re converting lawn to garden, the soil will inevitably be compacted by years of foot traffic, mowing, etc. Use a strong (thick tines) garden fork and plunge it into the soil on an angle about like this.
Push down on the handle so that the soil is just “fluffed” a little bit as such.
Work backwards so you don’t compress an area you’ve already decompressed.
Step 2: Sheet mulch. We use newspapers (no glossy inserts), cardboard and scraps of unpainted and untreated plasterboard/drywall (Gib/Sheet Rock). It is handy to have wet newspapers, especially on windy days. You can put a stack of newspapers into a wheel barrow and run a hose over them, or…just leave them outside for a few weeks like we do.
Lay out the newspapers 3 to 6 sheets thick with generous overlap (50 to 100 mm) between each sheet. Don’t be stingy with these. In our present world old newspapers are abundant.
Here I am building the new bed adjacent to an existing bed. Edges tend to be high maintenance areas, so I design to minimize them.

Because we have some very aggressive grasses that tend to invade our beds, I “reinforce” the edge with a bit of plasterboard.
Step 3: Deciding on siding. Almost anything can be used as sides for a raised bed. You don’t even need sides at all. But many people prefer them. I like to use whatever is local, abundant and/or free. In the past I’ve used bricks, blocks, scrap wood, stone, and beams from a barn that was torn down. At present we are using a combination of concrete edging we got on Trade Me and concrete fence posts we got for free at the transfer station. I would recommend against using treated wood, but I’ve seen plenty of people do it.
Step 4: Fill ‘er up! Many people like to use a “lasagna method.” There are lots of recipes you can find by Googling. I prefer to use whatever is local, abundant and/or free. We make lots of our own compost that we use generously. But in this case we had some leftover topsoil that was just sitting in a pile conveniently next to where I decided to build this bed.
We also happened to have plenty of sheep manure that we bartered for French doors that we did not need.
I raked the soil and manure flat in the bed. Please note that I usually make beds no wider than 1.2 meters so that I can reach halfway into them from each side without ever stepping in the bed. This is crucial in low maintenance garden management. Never step in the beds!
But in this case where the bed is wider than 1.2 meters, I placed bricks as stepping stones for access to the middle of the bed.

Step 5: Plant. Depending on what techniques you use, you can direct seed or transplant into the bed straight away. Here I planted seed garlic just wider than a stirrup hoe, which is my main weed management tool.

Over time the grass under the bed will rot down into a “green manure.” The worms will happily munch away and stir it up, and the roots of your vegetable plants will thrive in the loose, fertile soils.
Other options: In the next post I’ll explain another technique that is even faster and cheaper.
Peace, and get planting, Estwing

A Compost Tea for Plants

Aerated compost tea is becoming increasingly popular within organic gardening circles, yet producing such teas still remains a mystery to many. Here at the Eco School we decided to take on the challenge of brewing up a simple aerated tea as a way of adding beneficial microorganisms to the plants and the soil. We began our experiment with a 15 liter plastic bucket and an old fish tank air pump. In the bucket we suspended two cups of compost rapped in a loose-weave cloth and placed the aerator tubes at the bottom. The bucket was then filled with chlorine-free water. We set the tea outside with the aeration on for twenty four hours.

The number of aerobic microbes in the tea grows exponentially, reaching a peak in population in twenty-four hours. We used the tea immediately at full strength in our watering can to foliar feed the plants and inoculate the soil with microorganisms.

Commercial compost tea producers rely on laboratories to check for the proper numbers and types of microorganisms they have in their tea. We are going to rely on some well-made compost and a little luck. I have attached additional links for more reading about aerated compost teas below.

http://www.simplegiftsfarm.com/compost-tea.html

http://www.compostjunkie.com/compost-tea-recipe.html

http://www.soilfoodweb.co.nz/index.php?option=com_content&view=article&id=78&Itemid=56

Willow Update

It has been nearly a month since we started our willow pollarding and pega pega experiment and we thought it might be time to give you an update.

You might remember that our Christmas Willow was a single branch that we had brought indoors and kept in a bucket of damp sand.

About two weeks after Christmas we brought the bucket and branch outside and removed all of the foliage. We were hoping this would encourage the tree to put its energy into creating roots and new buds, rather than trying to heal the older foliage.

We left the branch outside right near our tap, so we would remember to water it regularly. And two weeks later…

Success! We think. There appear to be healthy new buds forming on the branches. We haven’t probed into the sand, but my guess is that if we did, we would find new root buds as well. We’ll leave this little guy in the bucket until it has some more significant foliage and then will transplant it out to form the first part of our living-firewood-shelterbelt-fence.

The mother willow is doing even better than the cutting. In just four weeks the place where we did our major cutting has gone from this…

To this…

That’s a lot of growth! Now we need to decide if we want to keep all of these new branches and have about one dozen small branches, or trim them, to encourage the tree to put its energy into just one or two. My gut tells me to trim the new branches back, and leave two, but I don’t want to stress the tree too much. Any suggestions?