Category Archives: growing food

Act Locally, Share Globally

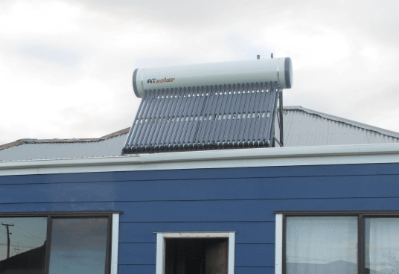
I am a natural skeptic about new technology. I am not an “early adopter.” I am more Amish in my approach – carefully weighing the costs and benefits before choosing what is appropriate. The technologies we’ve chosen to embrace for this project have well-documented results for return-on-investment in terms of energy savings. Examples are insulation and solar hot water.
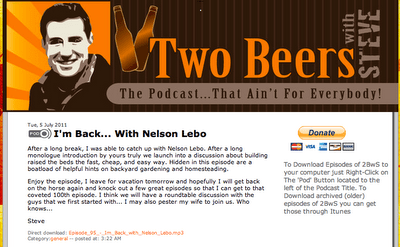
Education also embraces certain technologies. And naturally, I am skeptical about those as well. It took me years to appreciate the power of blogs and podcasts. But now I am sold on their educational value. One of my favorite podcasts is called Two Beers with Steve.
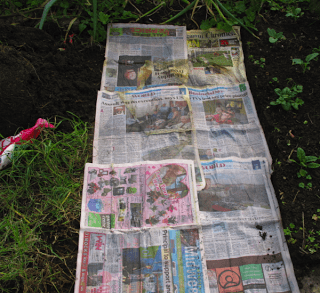
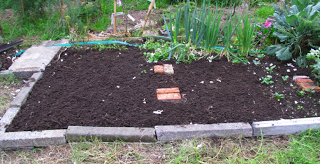
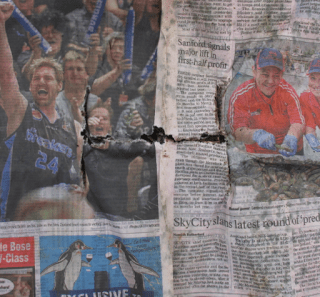
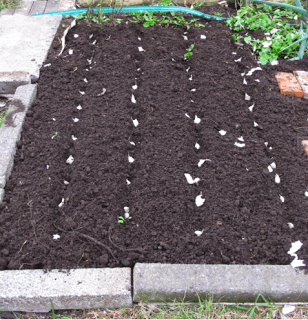
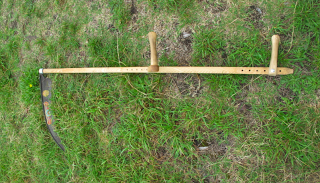
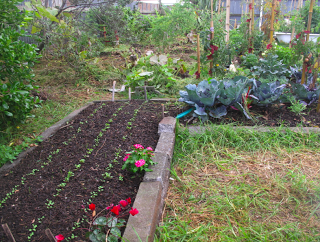
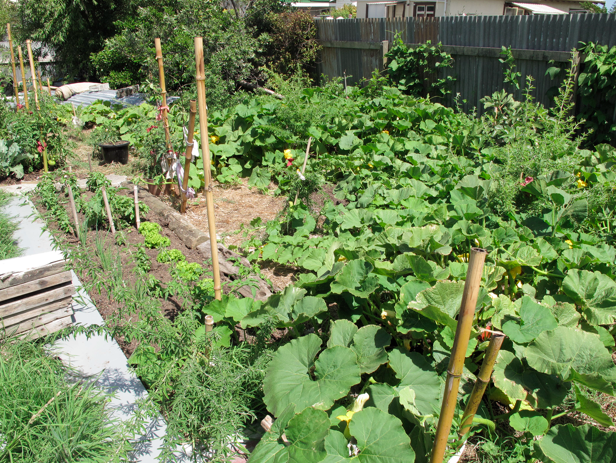
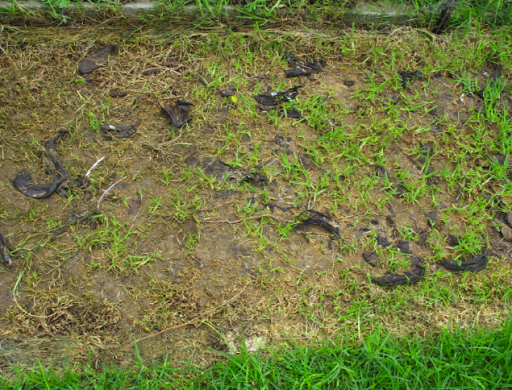
I have done a number of interviews with him in the past, but this one is designed to coincide with my do-dig garden series: Part 1, Part 2, Part 3.
While I remain skeptical about much of the use of the internet, I think it has been a great help to us sharing the success of this project with a world wide audience. Our goal is to demonstrate that being green is not expensive. On the contrary, not being green is expensive! We enjoy a high quality of life with very low energy and food bills, and we are actively involved in making our local community more sustainable. Some of our experiences may be considered useful by someone on the other side of the planet. The web allows us to share our story with them with a very low carbon footprint.
So as the environmental movement evolves, I propose the next stage of evolution involves acting locally and sharing globally. Governments and corporations won’t do it for us. We need to help one another learn how to be green and save some green.

Peace, Estwing

No-Dig (Part 3): Ground Preparation

In the first post of this No-Dig series I described how decompressing the soil with a garden fork is the first step of the process. While that’s true, there are some ways to prepare the site even before forking it over. Currently we are “tractoring” ducks…

…and chooks in areas where we plan to install beds. The fowl eat the grass and fertilize the future garden bed. Because we have two particularly aggressive grasses and other invasive weeds, it is important for us to knock them back before putting in new beds.

After the birds have done their job, the former lawn looks something like this. (Note the banana peels. We get “baking bananas” for $2 a box from a local veggie shop. We eat some and feed some to the ladies.)
But you may not have birds or even want them. Or maybe your municipality is even silly enough to outlaw them. Other techniques I’ve used include covering the ground with black plastic for extended periods of time (1 month to 4 months). Because plastic is UV sensitive, I extend its useful lifetime by covering the plastic with weeds. This serves multiple purposes. Along with making the poly sheets last longer, it is a way to dry out the weeds for later use as mulch and it looks much more attractive than a sheet of plastic laying in the yard.
And finally, to continue the local, abundant and free theme from the two previous posts, we happen to have heaps of roofing iron on our section. We use it to knock back aggressive grasses and weeds before bed building. Just make sure you weigh it down to protect against gusting winds.


Referring back to the first post in this series once again, the bed that I built on the solstice started out looking like this.


The iron had been there for about 3 months and the pile of topsoil on top of the Pink Batts plastic had been there for about a month. Although you can see a little bit of cacuya grass between them, I pulled that foliage off before placing an extra thick layer of newspapers there.
And in no time 100 garlic were in the ground.
An easy no-dig installation should be part of an easy, low-maintenance/high-productivity management system. And the key to that, in my decade plus of experience, is managing weeds. Two important parts of easy weed management are never stepping in the beds (see #1 in this series) and building in low maintenance edges (see #1 in this series).
I have run many workshops in 3 different countries on low-maintenance/high-productivity organic management. If you would like to host one in your area, please contact us. If you are a publisher, this management system is waiting for a book deal.
It is a great time to be building beds in both the Southern and Northern Hemispheres. Get on to it!

Peace, Estwing

No Dig (Part 2): Pocket Garden

This is a technique I developed a few years ago that is fast, inexpensive and attractive. The materials you need are: wet newspapers, a trowel, a bucket of compost, an empty bucket, seedlings, and a bale of hay/straw.
Step 1: Lay out newspaper on the lawn as explained in the previous post, and cut a capital H in the wet newspaper with the trowel.
Or a capital I if you prefer.
Step 2: Fold back the paper like opening French doors.
And dig out the sod and soil to the volume of a 1 litre/quart yogurt container. Carefully put the soil into the empty bucket so as not to allow weed seeds in the soil on top of the newspaper.

Step 3: Fill the 1 litre/quart hole with compost.
Step 4: Plant the seedling, water thoroughly, and fold back the newspaper.
Step 5: Mulch with hay or straw.
* Note that we don’t buy in hay or straw because we use tall grasses that we cut with a scythe and harvest with a rake. I have used wood chips as a mulch on one job, but that was only as a very low-budget approach in that particular case.
With a stack of newspapers and a few bales of hay/straw you could convert an entire lawn to garden in a weekend.

Peace, Estwing

No-Dig Garden Beds (Part 1)

I’m told that in the land of the long white cloud (Aotearoa/NZ) garlic is planted on the shortest day of the year and harvested on the longest. Fair enough. That’s more or less what we’ve done for the past two years. But last week I managed to land right on the 21st. It was a beautiful day and I spent a couple of hours building a new garden bed, taking pictures, planting garlic and missing an afternoon meeting that slipped my mind. Oops.

Even though it is the middle of winter here and the middle of summer in the northern hemisphere, it is still a fine time to put in a garden bed. On my farm in New Hampshire, I remained seeding fall greens (spinach, kale, Swiss chard) through the second week in August. If you have a small garden and want to expand it, or you want to start a garden on your lawn, here are a few things I’ve learned over the last 12 years of building beds.
* Please note that we use a number of techniques to prepare the plot before putting in a new bed, but those are not required. It is quick and easy to go from lawn to garden in one afternoon. I’ll explain those prep techniques in another post.
Step 1: Decompress the soil. Assuming you’re converting lawn to garden, the soil will inevitably be compacted by years of foot traffic, mowing, etc. Use a strong (thick tines) garden fork and plunge it into the soil on an angle about like this.
Push down on the handle so that the soil is just “fluffed” a little bit as such.
Work backwards so you don’t compress an area you’ve already decompressed.
Step 2: Sheet mulch. We use newspapers (no glossy inserts), cardboard and scraps of unpainted and untreated plasterboard/drywall (Gib/Sheet Rock). It is handy to have wet newspapers, especially on windy days. You can put a stack of newspapers into a wheel barrow and run a hose over them, or…just leave them outside for a few weeks like we do.
Lay out the newspapers 3 to 6 sheets thick with generous overlap (50 to 100 mm) between each sheet. Don’t be stingy with these. In our present world old newspapers are abundant.
Here I am building the new bed adjacent to an existing bed. Edges tend to be high maintenance areas, so I design to minimize them.

Because we have some very aggressive grasses that tend to invade our beds, I “reinforce” the edge with a bit of plasterboard.
Step 3: Deciding on siding. Almost anything can be used as sides for a raised bed. You don’t even need sides at all. But many people prefer them. I like to use whatever is local, abundant and/or free. In the past I’ve used bricks, blocks, scrap wood, stone, and beams from a barn that was torn down. At present we are using a combination of concrete edging we got on Trade Me and concrete fence posts we got for free at the transfer station. I would recommend against using treated wood, but I’ve seen plenty of people do it.
Step 4: Fill ‘er up! Many people like to use a “lasagna method.” There are lots of recipes you can find by Googling. I prefer to use whatever is local, abundant and/or free. We make lots of our own compost that we use generously. But in this case we had some leftover topsoil that was just sitting in a pile conveniently next to where I decided to build this bed.
We also happened to have plenty of sheep manure that we bartered for French doors that we did not need.
I raked the soil and manure flat in the bed. Please note that I usually make beds no wider than 1.2 meters so that I can reach halfway into them from each side without ever stepping in the bed. This is crucial in low maintenance garden management. Never step in the beds!
But in this case where the bed is wider than 1.2 meters, I placed bricks as stepping stones for access to the middle of the bed.

Step 5: Plant. Depending on what techniques you use, you can direct seed or transplant into the bed straight away. Here I planted seed garlic just wider than a stirrup hoe, which is my main weed management tool.

Over time the grass under the bed will rot down into a “green manure.” The worms will happily munch away and stir it up, and the roots of your vegetable plants will thrive in the loose, fertile soils.
Other options: In the next post I’ll explain another technique that is even faster and cheaper.
Peace, and get planting, Estwing

Compost Post

Following up on the post of 12th June (Perfection), here are more details on our methods of composting organic matter. You may recall that we diverted over 95% of materials from landfill at the Connecting Families Day run by YMCA Wanganui. Alongside paper recycling and drink bottles recycling, the bulk of material came in the form of compostable organic matter: napkins, sausages, bread, apple cores and paper cups.


In anticipation of this organic matter coming onto our land, I “feather a nest” by forming a large rectangular bowl with grass cut on a neighbor’s property and “donated” to us by the landscaper. Into this bowl I easily dumped the organic matter collected at the YMCA event.


Then I added half a coal bag of sheep manure we bartered for with a surfing friend. The nitrogen in the manure will balance the high carbon content of the paper cups and napkins.


Then I covered the lot by raking grass over it to prevent wind from blowing the cups around and to allow the compost to “cook.” By turning the pile once every 48 to 72 hours, it will hold temperatures between 50 to 60 degrees Celsius (122 – 140 F) and be completely decomposed in about a month.


Then we’ll have roughly a cubic meter of beautiful, healthy compost ready for our spring planting.

Peace, Estwing

Perfection

I appears that many global forces of unsustainability have been swirling of late. The synergy with which these forces interact, and the non-linear effects make predictions near impossible. Most economists and politicians appear to be in utter denial of anything other than a return to “growth” and “business as usual.” (I’d say that is the one place we are not headed.) But one economist in particular seems to be able to recognize potential problems better than others.
You may recall that Roubini was the one who accurately predicted the financial crisis of 2008. Are you going to believe him, or someone like Greenspan or Bernanke or Geitner who had no clue?
While the right mixture of forces can, indeed, make storms perfect, the right combination of design, communication and education can make solutions perfect. For example, this weekend the ECO School helped the YMCA manage the waste stream for the Connecting Families Day.
No, not that YMCA, this YMCA.
With over 20 years of experience in award-winning resource recovery programs, we felt confident about working with the Y with the goal of a zero waste event. I’ll write more about the mechanical details in another post, but the guiding principles for success when managing events such as this are:
1) Plan ahead. Sometimes called “pre-cycling,” this means thinking about the entire waste stream of the event and planning accordingly. For example, we ordered compostable cups for both hot and cold drinks. Zero waste.
2) Design. (“Failure to design is to design to fail.”) The physical lay out of collection containers is important. They must be clustered together. For example, we had bins for compost, paper recycling, drinks bottles recycling, and miscelaneous rubbish all together at one station.
3) Communication. This comes in a couple of forms. A) Signage must be brief, clear, colorful and at eye-level for both children and adults. B) Announcements can be used to remind attendees that this is a zero waste event and their efforts are crucial for success.
4) Education. Including the why and how of resource recovery is important to give people reason to act. Our education effort took two forms this weekend. A) I manned the resource recovery station to interact with people and monitor quality control. B) Our friend, Hadi, provided home composting advice at the Sustainable Whanganui table.

5) Quality control. Essential, essential, essential. No one wants to pick through dirty bins afterwards. Make sure everything goes in its proper place during the event. As mentioned above, quality control can and should go hand-in-hand with education.
By employing the above strategy, we were able to divert over 95% of the waste stream from landfill while role modeling positive behaviours to families. Those are world-class results. Not bad for weekend work.
More details on our composting process in a later post.
Peace, Estwing

Alternatives to wheat and potatoes?

Not to harp on this climate change thing too much, but it just does not seem to go away. Of course along with the extreme weather events predicted by climate scientists are equally dire warnings of drought. That seem to be widespread at the moment.
Well, 2011 seems to be shaping up as a poster child for climate change. Combine the extreme weather with the ongoing global financial crisis and elevated yet still volatile oil prices and you have what some call the “Toxic Trilogy”; Environment, Economy, Energy. Each of these systems is highly unsustainable at the moment with little indication of change in the near term. As permaculturists, we design to protect ourselves from these powerful outside factors beyond our control.
We have written extensively on energy savings on this blog and warned about the dangers of debt and how to hedge against energy inflation. But we have not written much about hedging against food inflation, which goes hand in hand with energy inflation and is made worse by weather extremes such a drought and floods. Of course we have a large and growing vegetable garden and burgeoning food forest, but what about starch? Like most people of European descent, we eat too much bread and pasta. As indicated in the story above, the price of wheat is near record levels with no indication of coming down. My long time strategy has been to grow potatoes as a staple crop, but here in NZ we are having trouble with an aphid that is compromising all nightshades. Both our potato and tomato crops this year were poor. So last week I planted Jerusalem artichoke.
And in the spring we’ll plant kumara.
Any other suggestions?
Peace, Estwing

Fossil Fuel Free

As the sound of lawn mowers ringing out across neighborhoods wanes in the southern hemisphere and waxes in the northern, I cannot help but to ask…why?


Why burn limited fossil fuels manicuring a show piece?

Why buy and maintain an expensive, loud, polluting machine?

Why pay $2.10 per litre ($3.60 per gallon in the US) to run that machine?

Why contribute further carbon dioxide to an already overwhelmed atmosphere?

Why spend hours on land care that yields no food?

Problems: Global food prices are at a record high and rising. Oil has been above $100 per barrel for weeks and rose $3 today on increased concerns on the Middle East and North Africa.

Solution: Being “eco-thrifty” means going green and saving money. We use no oil to maintain our 700 square meter section using the following low-maintenance/high productivity techniques.

Growing Food

Once a weedy lawn, now a productive garden and burgeoning food forest.

Tractoring Ducks

Ducks eat grass and turn it into eggs, flesh and fertilizer.

Scything

Interns Amy and John learning how to harvest carbon-neutral mulch.

Please people. Stop the mowing madness! For the good of your wallet and the planet.

Peace, Estwing

A Compost Tea for Plants

Aerated compost tea is becoming increasingly popular within organic gardening circles, yet producing such teas still remains a mystery to many. Here at the Eco School we decided to take on the challenge of brewing up a simple aerated tea as a way of adding beneficial microorganisms to the plants and the soil. We began our experiment with a 15 liter plastic bucket and an old fish tank air pump. In the bucket we suspended two cups of compost rapped in a loose-weave cloth and placed the aerator tubes at the bottom. The bucket was then filled with chlorine-free water. We set the tea outside with the aeration on for twenty four hours.

The number of aerobic microbes in the tea grows exponentially, reaching a peak in population in twenty-four hours. We used the tea immediately at full strength in our watering can to foliar feed the plants and inoculate the soil with microorganisms.

Commercial compost tea producers rely on laboratories to check for the proper numbers and types of microorganisms they have in their tea. We are going to rely on some well-made compost and a little luck. I have attached additional links for more reading about aerated compost teas below.

http://www.simplegiftsfarm.com/compost-tea.html

http://www.compostjunkie.com/compost-tea-recipe.html

http://www.soilfoodweb.co.nz/index.php?option=com_content&view=article&id=78&Itemid=56

Tears and Revolution

You are probably as aware as I am that global food prices reached a record high recently, surpassing even the spike in June 2008 which caused riots in more than a few countries and led to at least one government being overthrown. This time around there also appears to be civil unrest associated this higher food prices.

I’m fascinated that a number of powerful forces are using the high food prices to try to push genetically-modified seed into markets previously resisting GM food for any number of reasons. GM (also known as GE – genetically engineered) seed, they argue, is essential for feeding an ever-growing human population and prevent starvation and malnutrition. This, of course, would lead to more concentration of power and wealth while leaving the dispossessed even more dispossessed.

It is simultaneously maddening and tragic. I don’t know whether to cry or revolt. In the end I do a little of each.

These are my tears…

and this is my revolution.

Keep growing, Estwing.