Carbon Neutral Lawn

I’ve been writing a lot about warm, low-energy, healthy homes lately, so I’ve decided to change things up for a mid-winter’s break and write about summery things like yard and garden. For us, the outdoor “renovation” of our weed-infested section has been as significant as the passive solar redesign of our old villa. We have used most of the same design thinking in both cases, and strive to create systems that both save money and a have low impacts on the environment.
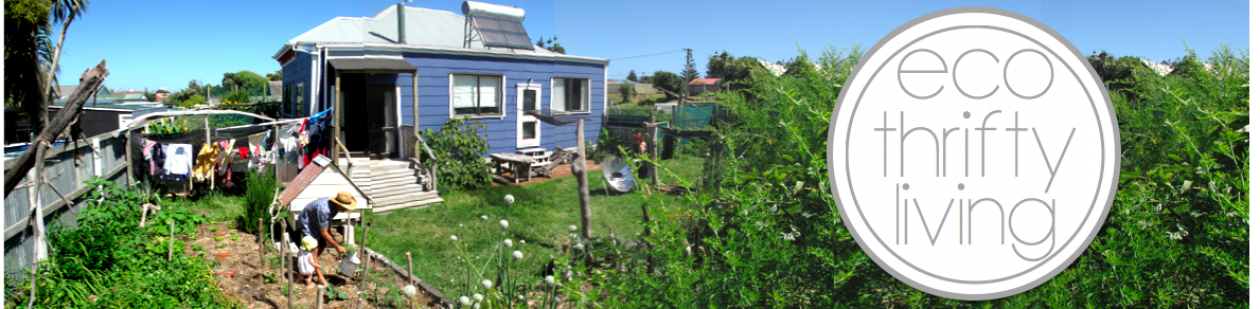
Crediting my lovely and brilliant wife with coining the term ‘eco-thrifty’, I have no better way to describe what we have accomplished on our vast holdings of 700 metres squared: a carbon-neutral (well, actually we store carbon), regenerative (getting better, ie healthier, every season) and productive (ie, kai) landscape.
Boy, that was a lot of information after the colon. Let’s dissect it piece by piece.
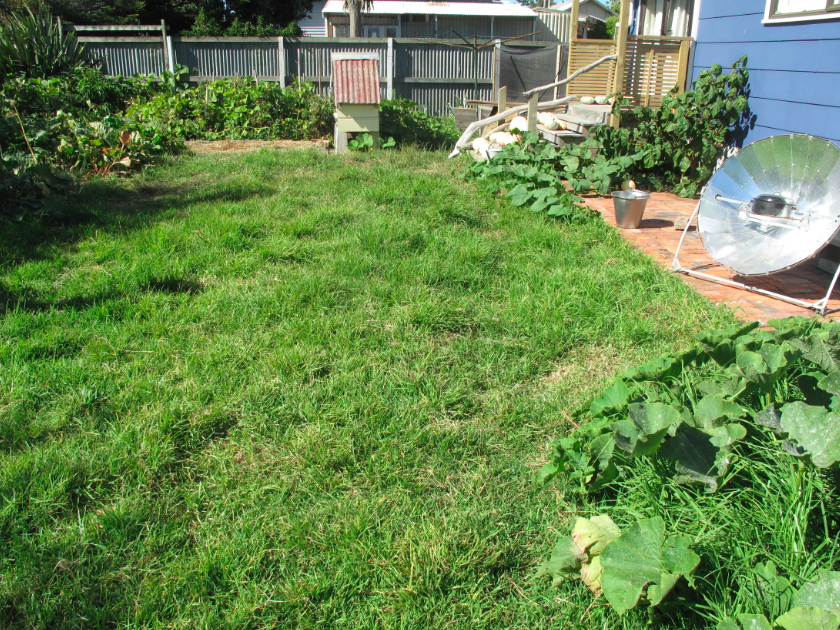
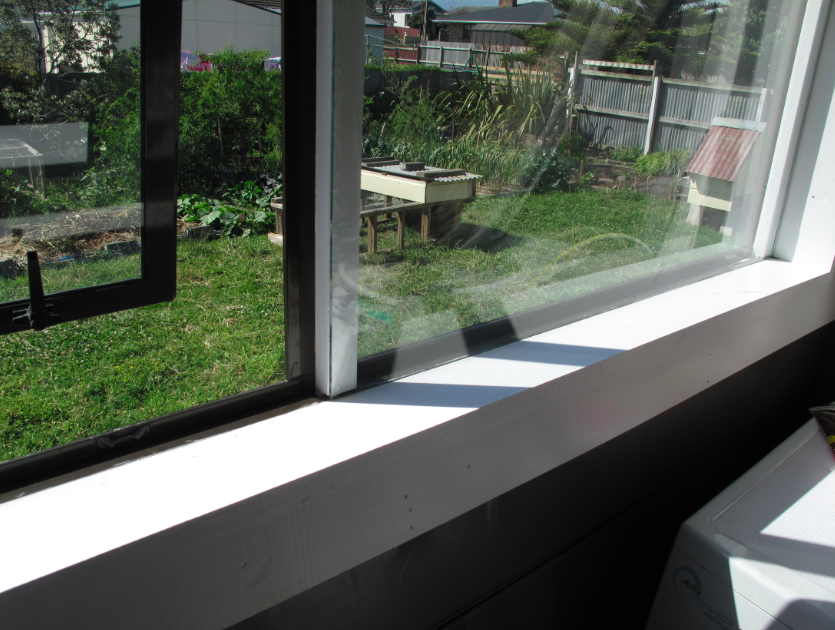
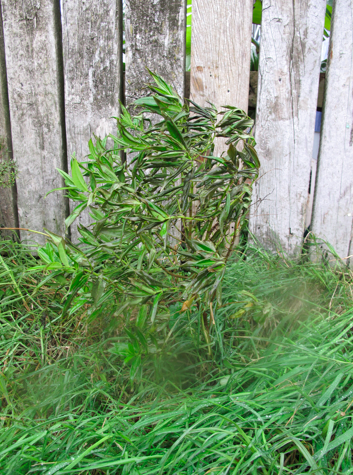
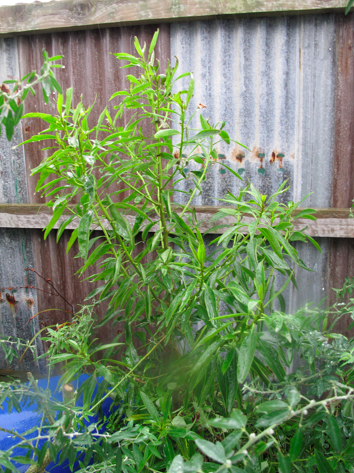
Our lawn, 3rd March 2013, after 3 months of summer drought. 

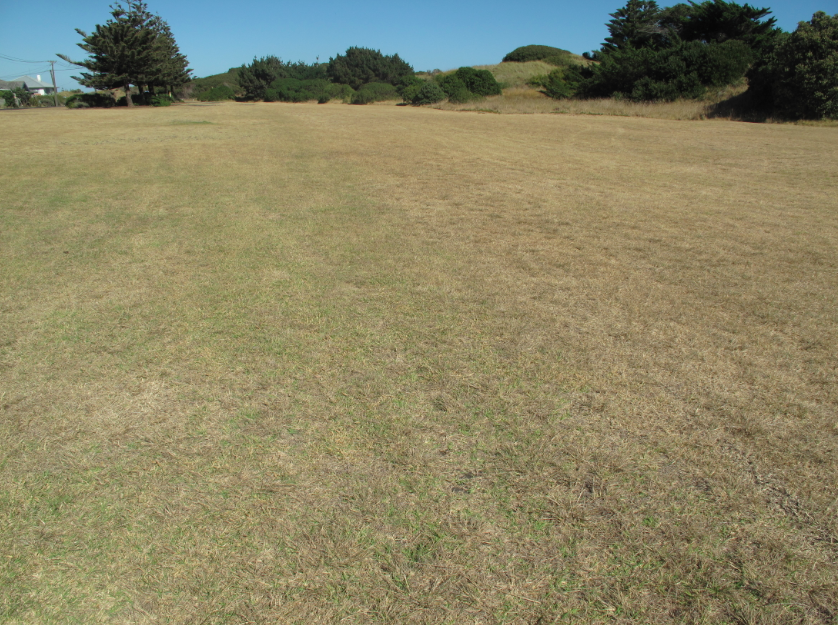
 Castlecliff Reserve, 3rd March 2013, after 3 months of summer drought.
50 meters from our lawn, pictured above.  
Carbon-Neutral. Not that it is a big accomplishment, but we manage our 700 square metre section without the use of a mower. At the risk of offending some readers, I’ll put the next point as delicately as possible: In my opinion, petrol mowers are neither eco and nor thrifty. They cost money to buy. They cost money to run. They cost money to repair. They create noise pollution and air pollution. Just my opinion.
Regenerative. We take a holistic management view of our section wherein we retain about a third of it in grass, but avoid the use of a mower by using chooks and ducks to ‘work’ for us on a seasonal basis. During the colder months – roughly May through August – we ‘tractor’ our fowl across our lawn. You may have heard of a ‘chicken tractor’ before, but trust me, they work just as well for ducks.
If you haven’t heard of a chicken tractor, its just a mobile chook pen, and if I have communicated well with my editor there just may be a picture of one somewhere on this page. As an aside, one of my favorite all-time discoveries is Google Image Search. Type in ‘chicken tractor’ and see what you get!
Rosemary, Amelia and Eunice. 
As the chooks and ducks graze the grass, they stimulate root growth, which makes most grasses healthier. Additionally, their poos fertilize the grass and make it healthier still. These healthier grasses out-compete the opportunistic weeds that once thrived in our poor, dry, sandy soils. The more we have tractored the birds, the healthier the grasses have become, which then are even healthier for the birds to eat. This type of a positive ‘upward spiral’ is often called regenerative.
Productive. To go ‘old school’ on you for a moment, almost every square inch of our property contributes to the growing of food. How, you may ask, can that be when I’ve already stated that a third of it is in grass. Well, sure, the chooks and ducks eat some grass, but all of them prefer layer pellets. As you would.
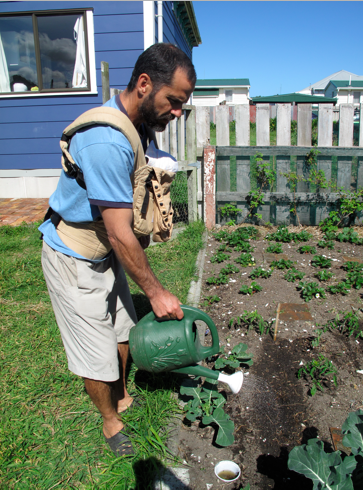
More significantly, we grow our own mulch on our property. As mentioned above, tractoring the birds across the lawn for five cold months a year improves the health of the grasses. But we do not want to be stepping in duck poo all summer long. For the seven warmer months, we let the grass grow for three to four weeks at a time and then cut it with a scythe. The cut grass is dried and then used to mulch our vege gardens. It’s all part of ‘the circle of life.’ Hakuna matata, bro.
Want to learn more? Check out these upcoming workshops:
The Carbon-Neutral Lawn: 13th July, 3-4 pm, or 14thJuly, 3-4 pm.
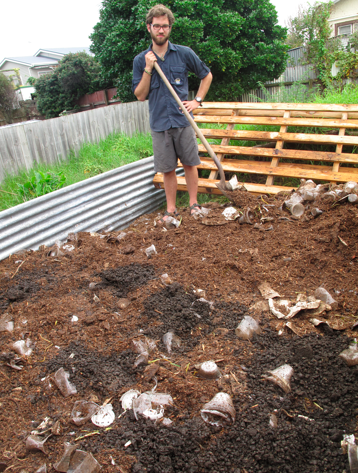
How to REALLY Compost: 13th July, 4-5 pm, or 14thJuly, 4-5 pm

Winds and Wind Protection

First the bad news: We had gusts of 126 km/hr last week.

Now the good news: Our roof is still on.

And finally, a question: If homes are built to sustain maximum wind gusts, why aren’t many gardens?

Living about 300 meters from the Tasman Sea, we believe they must be. In these parts, the winds are strong enough to blow the Blacks off the All Blacks.

So we have put a lot of time, effort and money into erecting wind breaks.

We have also braced the windward fences to account for the additional wind load caused by the netting. 

Our neighbours did not.

Their fence came down and pulled part of ours with it.

See here, their fence posts snapped at ground level.

And that force snapped one of our rails.

Biologically, here is evidence of wind damage to the ‘wild’ bush lupine growing unprotected in front of our home.

Another legume, tagasaste, also suffered some minor wind burn.

To compare like with like, the next photo is of a native hebe without wind protection.

This hebe is protected from the wind.

Overall, our fruit trees and annual gardens suffered negligible damage. After a storm like last week, I’m glad for our extensive efforts at wind protection.

Peace, Estwing

She’s Crafty: Driftwood Frame Playgym

This is one of the first projects we made for EcoThrifty Baby. We wanted a play gym for her, but were (and still are) trying to avoid plastic as much as possible. Ironic, since tupperware is her ultimate favorite toy at the moment.

Screen shot 2013-06-22 at 9.39.08 PM

ETB chillaxin on her sheep skin under her handcrafted playgym – lifestyles of the rich and famous.

I made the hanging pieces for this playgym from scrapbook paper glued onto cardboard. I tried to pick natural themes and shapes, but also wanted her to have high contrast and bright colors for her little developing eyes.

playgym
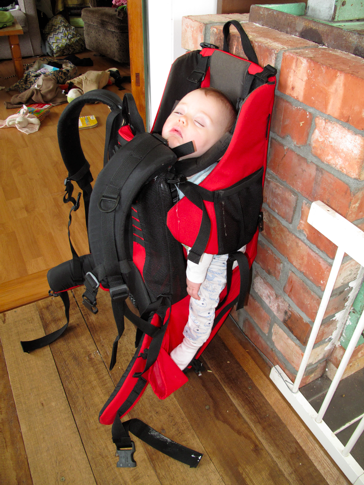
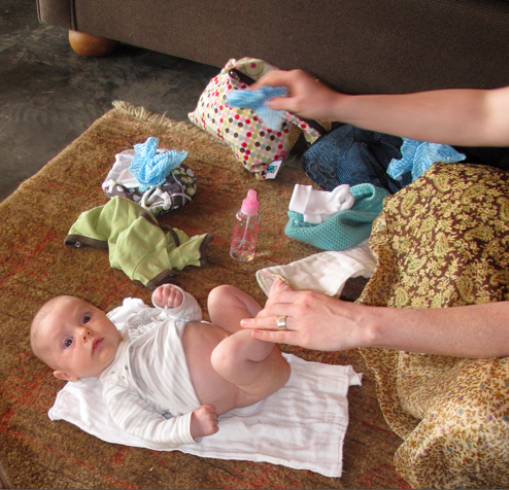
The pieces of ETB’s play gym were scrap book paper glued onto thin cardboard.

ETH scoured the beach near our house for a few days before he found the perfect pieces of driftwood to form the base and hanging frame. He then drilled a hole into the base just slightly smaller than the diameter of the piece that he wanted to use for the frame, and sanded it down to make a perfect fit. The base is heavy enough that ETB can’t pull it over if she tugs on the shapes.

Screen shot 2013-06-22 at 9.38.48 PM

Driftwood frame with no glue, no nails.

When ETB was a tiny infant we hung the shapes over her carseat and bassinet. When she transitioned into her bouncy chair, they were her favorite entertainment. Now that she is a crawler, this still sits in the corner of her play area. Every once in a while she still bats around the shapes, but I think her days of really enjoying the play gym might be over (sniff, sniff).

Screen shot 2013-06-22 at 9.37.49 PM

ETB as a tiny bub with her play gym pieces hanging above her.

Screen shot 2013-06-22 at 9.45.16 PMETB is a big girl now and her play gym still sits in the corner of her play space.

DIY Double-Glazing

Let me begin with the following statement: Taking pictures of windows is extraordinarily difficult.
Now that that’s established, I’ll follow up with this statement: DIY double-glazing can take many forms.

Regular readers of this column will be well aware of plastic window film DIY double-glazing. Local man, Jason Quinn, was recently selected as a finalist in the Innovation awards for his product, Space Window Insulation.
We have used his product in our home to a certain extent, but lately I have been experimenting with DIY glass double-glazing as a more permanent way to reduce heat loss through windows. I believe this would be considered “retrofit” double-glazing, because we are doing it to our existing windows – both aluminium and timber.
Before I describe the different ways I’ve done this, a reminder: insulation in ‘trapped air.’ In other words, the second sheet of glass or plastic does not add any significant insulating value, it is the air trapped in between. The aforementioned Jason – literally a former rocket scientist – tells me that the optimal air space (gap) to the second sheet – be it plastic or glass – is about 22 mm. Typically, timber windows have a 25 mm gap between the glass and the interior frame, but aluminium windows offer only a 5 mm – 7 mm gap.
So far I have retrofitted five windows in four different ways. The first one was an aluminium window with Space Window Insulation. The good news is that it was cheap and easy, but the bad news is that there is only a 6 mm air space. Then again, 6 mm of trapped air is better than none.
The next window I retrofitted was in our bathroom. The building code required us to have safety glass, but instead of removing the original glass and replacing it with safety glass, I commenced my first attempt at glass DIY double-glazing. Here is where the difficulty in taking pictures of glass comes in. Follow along the numbered photographs as best you can.
1) As with any DIY project, it pays to organize all your tools and materials in advance.
2) I glued vertical timber battens – primed and painted on all sides – to the aluminium frame. These take up the space of the trough at the bottom of the frame, and provide a 22 mm gap between the two panes.
3) I set the glass with a bead of silicone on both vertical battens.
4) I screwed two horizontal battens – top and bottom – into the timber frame to hold the glass against the vertical battens.
This design worked well, so I repeated it on an identical window in our kitchen, but I was forced to change plans when facing our large lounge window because there was no aluminium trough. I could have used timber battens again to create an air space greater than 6 mm, but the process of measuring, cutting, priming, and painting (two coats) is long and drawn-out. Instead, I used a roll of 12 mm adhesive foam to make an 18 mm gap (6 mm + 12 mm) all around the window. Then I simply used timber battens top and bottom to hold the glass in place.
Finally, in our bedroom – where we have timber windows – I used yet another design. Here it was a combination of adhesive foam and right-angle timber battens. It would take a thousand words to explain it, so I’ll refer you again to a photo: 5) side-by-side single-glazing and double-glazing.
Want to learn more? DIY Double-Glazing Workshops: 25thJune, 5-6:30 pm. 29th June, 9-10:30 am. 30th June, 4:30-6 pm. Registration essential: 022 635 0868 – theecoschool@gmail.com

Baby Wearing for Beginners

I kind of always knew I’d be into baby wearing. I’m a pretty snuggly gal. But when Eco-Thrifty Baby was born I really had no clue what kinds of slings and wraps were out there, no less how to use them. Luckily we were gifted about 6 or 7 hand-me-down baby wearing devices to try out. Here’s a summary of the ones we tried and kept or ditched.

Screen shot 2013-06-19 at 9.31.33 PM

Screen shot 2013-06-19 at 9.29.23 PM

ETB fully endorses napping on mom.

Fixed length slingFAIL

We were gifted several of these. The most highly recommended was my brother in law’s  self-named “duderus”, a stretchy cotton fixed-length sling which he lovingly passed on to my husband. Passing the torch in an act of brotherly love. Unfortunately the duderus didn’t do it for either of us. It felt too loose, too floppy, and like she might get lost in there. Its possible that it was the wrong size.

Screen shot 2013-06-19 at 9.30.38 PM

 We try out a fixed length sling. Strawberries were good, sling not so much. But it was pretty.

We also tried a non-stretchy fixed-length sling. I think this one was definitely the wrong size. I think I used it twice, but always kind of felt like I had to keep one hand under it or she might fall out. It also kind of hurt my shoulder/neck on one side. Even my little peanut of a babe felt like too much weight just to have hanging off of one shoulder. I wanted to love this, I did. But it just wasn’t for me.

Adjustable sling – Eco-Thrifty Mama: FAIL   Eco-Thrifty Papa: WIN

Eco-thrifty Papa loved a sling that we called “The PeaPod”. It was an adjustable sling that clipped at the top and has drawstrings on both sides so you could cinch them closed. It was easy to get her in and out, even when asleep and he found it really comfortable. I, however, just could never quite shake the feeling that if I took my hand away, she wouldn’t just fall down. So, I ended up walking around with one hand always under the sling. Not very effective.

Screen shot 2013-06-19 at 9.23.56 PM

ETB asleep in “The Peapod”, taking a break from harvesting that cauliflower no doubt.

The Improvised Sling- Obviously a Massive life WIN.

Sometimes we just didn’t have our act together in those early days. And since our baby does her best (read: only) sleeping on me, having some kind of baby-wearing device was totally necessary. When she was little a muslin blanket  with the corners tied over my shoulder worked really well.

Screen shot 2013-06-19 at 10.15.48 PM

Shooting hoops at a work event. ETB slept through the whole thing.

Stretchy Wrap – Eco-Thrifty Mama: WIN     Eco-Thrifty Papa: FAIL

We had “The Ultimate Baby Wrap” and I seriously adored it. So comfortable. So secure. ETB loved being in there and I could do anything in it. See ETB’s first game of tag, below. Really, ETP also loved wearing the stretchy wrap, he just couldn’t be bothered wrapping it. So, as long as I wrapped him up in it, it was a win for him too. And to be honest, it was kind of a pain to wrap, but after a few days I was super speedy and could even take her in and out without re-wrapping.

Screen shot 2013-06-19 at 9.32.34 PM
ETB’s first game of tag. 9 weeks old.

The only problem with our stretchy wrap was that it was really stretchy. So by the time she got to about 3-4 months it seemed like she was too heavy for it, because it would stretch so much. But, it was good timing, because by then she had fairly good neck control so we upgraded to the Ergo. I think I would really love a non-stretchy wrap for ETB now that she is bigger, but haven’t been able to find one in New Zealand. It is definitely on my wishlist for our upcoming trip to America.

Screen shot 2013-06-19 at 9.22.14 PM

Our first time ever baby wearing. ETB about 1 week old. Sooooo little. 

Screen shot 2013-06-19 at 9.25.01 PM

We do the dishes. Doesn’t happen often, definitely worth taking a picture of.

Ergo – WIN WIN WIN

Our Ergo was handed down to us by my sister and brother-in-law, so I already had lots of practice carrying around the ETNeices in it during my many summers of nannying them. We love the Ergo. We started using it fairly early, although I preferred the stretchy wrap until she outgrew it. We used it as a front pack until about 7 or 8 months, and now use it both front and back. Getting in on with her on my back was a superhuman one-person job at first, but is getting easier as she gets better at standing. I don’t know where we’d be without our ergo, it is where ETB does most of her napping and hence is where I do most of my working.

Screen shot 2013-06-19 at 9.25.45 PM

ETB tucked into the ergo at about 3 months.

 Screen shot 2013-06-19 at 9.39.41 PM

Right: Baby belay. ETB is my anchor in the ergo.

Frame pack – Eco-Thrifty Papa: WIN  Eco-Thrifty Mama: 3/4 WIN

We really love our frame pack, and ETB seems to too. We started using it at about 6 months, and had to rig the straps up to make them small enough so she wouldn’t fall out the sides. We like it because it is cooler on our backs, seems to take the weight off our shoulders, and ETB gets to look around more. I still tend to use the Ergo more than the frame pack, but ETP definitely prefers the pack.

Screen shot 2013-06-19 at 9.41.33 PM

Left: We need to invent some kind of holster for the frame pack so ETB can nap in there without me wearing it. Screen shot 2013-06-19 at 9.36.31 PM Right: ETB learning on the job. Laziest apprentice ever.

I hope that was a little helpful to anyone thinking about buying a carrier. I’d love to hear any recommendations from other baby wearers, especially anyone who uses a wrap for their older baby or toddler.

Screen shot 2013-06-19 at 9.44.28 PM

Here is ETB at the farmer’s market with her Aunt Molly selling the world’s best garlic.

Upcoming Workshops

ECO School Workshops June/July 2013

DIY Double-Glazing Workshops:
25th June, 5-6:30 pm.
29th June, 9-10:30 am.
30th June, 4:30-6 pm.
Choose one that suits you.
This workshop provides examples and advice on DIY retrofit double-glazing including plastic and glass options for both timber and aluminium windows.
Registration essential: 344 5013    022 635 0868 – theecoschool@gmail.com    
Waged $15, Unwaged, $10. 
The Carbon-Neutral Lawn
13th July, 3-4 pm
14th July, 3-4 pm
Choose one that suits you.
Save money and help the environment by managing your lawn as an organic system that produces food and does not pollute. This workshop introduces three techniques we use to improve the health of our land and grow abundant food with little effort while using no petrol or noisy, smelly, expensive lawn mowers.
Registration essential: 344 5013    022 635 0868 – theecoschool@gmail.com    
Waged $10, Unwaged, $5. 
How to REALLY Compost
13th July, 4-5 pm
14th July, 4-5 pm
Choose one that suits you.
Most organic growers worldwide will tell you that growing great fruit and vege requires great compost. From my experience, the best compost is that which I make myself. It also happens to be the cheapest. This workshop provides the best advice on making your own high quality compost, trouble-shooting a compost heap, and the bust uses of compost to enhance fruit and vege production.
Registration essential: 344 5013    022 635 0868 – theecoschool@gmail.com    
Waged $10, Unwaged, $5. 

Styley Maternity Clothes That won’t Break the Bank

So when I say I’m eco-thrifty, I mostly mean I’m cheap. Bonus- being cheap can often have the upside of being eco-friendly (buying second-hand = no new junk coming onto the planet). But just because I’m “eco-thrifty” doesn’t mean a girl don’t wanna look fine.

Screen shot 2013-06-16 at 9.34.55 PM

23 Weeks. I thought my belly was big. Ha! Wrap skirt from thrift store, tank top from pre-preg.

So, I was kind of hell-bent on not buying maternity clothes. I just didn’t see the point in spending tons of money on sweat-shop made garments that I would wear for just a few months. So, I didn’t. I was gifted a bunch of maternity clothes from my sister and some friends, but to be honest the clothes I wore most weren’t maternity. I just felt more comfortable in clothes that were things I would normally wear, things that I could find at second-hand stores. Things that were more me.

So here are my tips for dressing styley (if I do say so myself) while your body goes through the most dramatic changes possible in a span of 40 weeks.

Image

25 weeks. Stretchy mini-dress over leggings = happiness. Mini-dress from thrift store. Pink sash and mardi gras beads courtesy of my 5 year-old neice. Sick dance moves courtesy of me.

1. Stretchy is your friend.
When else in your life will people tell you how great your belly looks every.single.day? And I swear, the bigger you get, the more the compliments will roll in. So, flaunt it girlfriend. Strethcy will not only show off that bump, but will also give you lots of room for lungs and bladder to expand when baby shifts positions.Image

27 weeks. Ignore my ridiculous face here, and focus on the cute stretch mini dress. Dress from Valley Girl pre-preg. I wore this over leggings all the time (you’d think I’d have a better pic) into my third trimester, and still wear it now. 

2. If you buy something, make it something useful for after baby.

I think I bought a total of 3 actual maternity items. One of them was this cross-front shirt. It was super cosy during pregnancy and is now one of my favorite nursing shirts. The material is super stretchy so it wasn’t awkward or baggy after baby was born, and fit me nicely as my belly went from big firm to  big squishy to (hopefully kind of sort of) medium firm again.Image

30 weeks. Top from Pumpkin Patch, jeggings see below. Me and belly protesting fracking, deep sea drilling, and asset sales. 

3. Jeggings. (Seriously)

This may be the only time in your life where it is ok to wear jeggings. Why? because they are stretchy (anyone sense a theme here?), and you are a beautiful gaia mama. Honestly a friend gave me a pair pre pregnancy and I swore I’d never wear them, but damn if I didn’t live in those things. Even once the waist stopped fitting I did the hair-tie trick, then the bella band, and then just left those suckers open. I’m wearing them in the picture above and below. I don’t wear them anymore… somehow they don’t look as cute without the giant belly.

Image

26 weeks. Rocking the jeggings while I belay my 4 year-old neice. Girl can climb.

4. Buy this skirt (from a second hand shop that sells H&M stuff… or ebay?).

OK, if you can’t find this one, buy any stretchy mini skirt. But really, the texture and super-stretchyness of this one, made it my ultimate favorite. I actually can’t believe I don’t have a picture of me in it, because I seriously lived in this my third trimester, when I had to dress up a bit for work. I would wear it over leggings and pair it with a nice top. Image

5. Emphasize that belly.

Gone are the days of big blousy maternity wear that tented over you and baby, making you into some sort of family-sized camping accessory. Your belly is your best accessory. I know you might not believe me, but you look gorgeous. People are envious of your glow. You don’t look big, you look perfect. Rock that goddess body!

Image

40 weeks. Sari skirt tied over belly with t-shirt tucked in.

Other than the jeggings I still wear all of these clothes now, which is more than I can say for most maternity purchases people make. So be bold, go stretchy and embrace that belly!

Moving Warm Air within a Home

Last week I described many of the common pieces of advice I offer householders during the home energy audits I’ve performed as part of Project HEAT (Home Energy Awareness Training). When I walk through the door and meet the householders for the first time, I make two statements:
1) Every home is different and every occupant is different.
2) For a warm, cosy home, holding heat is the least expensive, and generating heat is the most expensive…but there is also the option of moving heat inexpensively.
The rest of this column is dedicated to explaining the addendum to the second statement: moving heat inexpensively.
About half of the homes I’ve audited have a single, fixed heat source at one end – usually the lounge – and cold, damp bedrooms at the other end. This hot lounge/cold bedrooms syndrome is probably what inspired the development of heat transfer units, which consist of insulated ductwork that runs above the ceiling with a small fan to push the warm air where it’s needed.
The electricity required to run a small fan is negligible. If you were to shut off every device in your home and turn on a small fan, the power meter would not even turn. However, if you put an electric heater in a back bedroom, you’d see the meter spin like an old Neil Diamond album. Hot August Night!
But, you point out, installing a heat transfer unit costs hundreds of dollars. True…and that’s why I have an eco-thrifty alternative.
Keep in mind that the idea here is to move excess heat from a room that has a fixed, economical heating unit – a wood burner, gas fire or heat pump – to other cold rooms. What good is having one room at 23 degrees and others at 14?
I have seen dozens of homes that are rectangular in shape, where the heater is at one far end and installed on an exterior wall. Given the age of these homes, it is safe to say the walls are uninsulated. This is a terrific example of terrible design. Even Mark Bachelder, the man who built my farmhouse in the states in 1782 knew enough to put the heat source in the middle! This style of home is called a “Centre-Chimney Cape” (short for Cape Cod).
In our home in Castlecliff, we installed the second-hand multi-fuel cooker on an interior wall next to the double-doorway to the lounge. We use an amazing self-propelled device called Eco-Fan to move the heated air from the kitchen into the lounge.
But we had the luxury to redesign our home and place the fixed heater appropriately. For those without this option, here is the eco-thrifty way to move warm air that anyone – owner or renter – could start using today. All it takes is two small desk fans with the bases removed.
I’ll use the common example of a heated lounge and a long hallway with two or three bedrooms at the far end. First, hang one fan in the top corner of the doorway from the lounge to the hall. This takes warm air from the ceiling and pushes it in the general direction of the bedrooms. Cool air will flow along the floor into the lounge where it is heated by the economical heater.
Next, hang another fan in the top corner of a bedroom doorway. This pushes the warm air from the hall ceiling into the bedroom. Switch the fan to another bedroom every 30 minutes between the hours of your evening meal and bedtime. That’s it!
But be aware, if you have a giant hall with high ceilings, it may be better to think about a heat transfer unit that would bypass the hallway. As someone once said, “Every home is different.”
Peace, Estwing

Our cloth diaper cleaning routine

Cloth diapers were one of the few parenting choices we were 100% sure of from the start. Of course, when we started we really had no idea just how much pee and pooh could come out of one little human. So it took us a little while to get into a routine that works well for us. And to be honest, now that we are in the swing of it, it really isn’t that hard. Honest.

I’m not saying that this is the best routine, but here is what we do these days to keep from getting buried under a mountain of cute little nappies:

Step 1: Change bum. If it is a pee diaper go straight to step 4. If it is a pooh diaper, there are a few more steps.

Step 2: Wipe that butt. We use cloth wipes made from cut up chucks cloths and car cleaning shammies, and only use water to clean with.

Screen shot 2013-06-09 at 9.32.02 AM

Step 3: Scrape. This is kind of the grossest part (but really isn’t so bad). We use a firm plastic spatula that we got from a second-hand store. My husband wrote “POOH” in giant letters just in case, but since it lives in our bathroom, on a string hanging from the tap in our laundry sink, there is really no chance that it could even get mixed up anywhere. We scrape poohs directly into the toilet as soon as possible and flush them away.

Step 4: Store & Soak. We bought this camping washing machine at the auction for like 15 bucks.It has been awesome! Best 15 bucks we ever spent. We separate the inners and outers, toss them in, and seal it up. Then just leave them. Once we have a full tumbler we then fill it with warm water and an eco-whitener and let them soak for at least an hour.

If we are out and about we just put the diaper and wipes in a dry bag until we get home and toss them in the tumbler. No biggie, really. A lot of my friends use disposables when out and about, but we’ve never had a problem with the dry bags.

It usually takes us 2-3 days to fill the tumbler. We have found that keeping the diapers “dry” during this wait time is MUCH less stinky that letting them soak.

Untitled1

Step 5: Wash. We wash our diapers on a long cycle in hot water with Eco-Store brand soap. Since they have already soaked, one wash almost always does the trick. If there are any stains, I do a quick rub with Sunlight soap and put back in the tumbler. My husband doesn’t worry about stains (“They’re diapers for goodness sake!”).

Step 6: Hang. We don’t own a clothes dryer. However, after visiting my parents and sister, I had some serious clothes dryer envy. Cuts down the total cleaning time by HOURS! But clothesline drying is possible, we just take advantage of every single sunny day to get a load of diapers out there.

Screen shot 2013-06-09 at 9.30.37 AM

So that’s it. We are 9 months in and the routine is working well so far. Verti has transitioned onto solids, and our system perseveres. I have noticed that lately some of her pee diapers have been kind of stinky. Not when they come out of the wash, only after she pees. I wonder if that’s due to her new found love of brussel sprouts, or if I need to run the diapers through a special cycle to de-stink them a little. Any tips? I’m wondering if a vinegar soak would help, or running them through once with a non-eco detergent might freshen them up.

Screen shot 2013-06-09 at 9.36.37 AM

Any tips out there from other cloth diapering mamas? Anyone else have stinky pee diapers?

10 Pieces of Advice for Warm, Dry Homes

There are few things less exciting than talking about energy efficiency. Watching bowling on television comes to mind, or perhaps filling out a government form. Also, changing nappies.
In order to hold your attention, I’ve recruited my cat, Billy T., to assist me. Billy T. knows all about solar gain and insulation. She always finds the warmest spots in our home. 
She is a walking, purring, home energy audit. However, some would deem it inappropriate for me to bring her along during the home energy audits I’ve been performing as part of Project HEAT (Home Energy Awareness Training).
Project HEAT is a collaborative partnership of over 20 Whanganui organisations, businesses, individuals, and The ECO School. So far, the programme has provided 8 neighbourhood presentations, 60 home energy audits, and a DIY workshop on window blankets. This can be considered a strong example of a “by the people and for the people” grassroots initiative. Good on all those partners involved.
The home energy audits are roughly modeled on a programme funded by many Councils across New Zealand called Eco-Design Advisors. I’ve worked with the Eco-Design Advisors from Hamilton City Council and Kapiti Coast District Council. Both have been extremely supportive by offering advice and suggestions.
Over the course of 60 audits, I’ve observed enough poorly designed homes to come up with a standard set of suggestions for reducing heat loss, reducing condensation, and saving power. I’ll share those here in the space remaining, although many of them have already been explained in past columns over the last 14 months, and on our blog over the last 30 months: www.ecothriftydoup.blogspot.com
Windows first, because glazing can account for as much or more heat loss as ceilings. There are five basic suggestions I make to nearly all householders I’ve consulted.
Heat loss through glazing can be reduced by:
• Curtains with pelmets
• Floor-length curtains
• Curtains with the rail fixed to the wall
• Window blankets
• Double-glazing: replacement, retrofit, plastic DIY.
In our home, we piggy-back multiple of these strategies on every window and glass door. For example, for our French doors we have a pelmet, a floor-length curtain, and a window blanket. Next to it is a replacement double-glazed window (our only one) with a pelmet over a Roman blind, and a window blanket. In the lounge, we have used plastic DIY double-glazing, a pelmet, and a floor-length curtain. Each layer adds that much more insulation.
Next, draught-sealing. Sealing draughts can be done by the average person in three ways:
• Foam window and door seal
• Door-mounted draught excluders
• DIY draught blockers
Finally, reducing interior moisture and condensation. The ‘best’ two ways to do this are:
• Lay polythene beneath the home to reduce rising damp
• Run a dehumidifier as needed
We do not use either of these, as we do not have condensation problems because we are on sand (no rising damp) and we actively limit moisture inside our home. But many homes on clay or peat can benefit greatly from properly installed polythene. Additionally, many homes can benefit from running a dehumidifier in the far reaches (aka, bedrooms) that, in many cases, are polar opposite the single, fixed heat source be it a gas heater or a wood burner.
A dehumidifier in a cold, damp bedroom offers three benefits simultaneously: 1) It reduces moisture. Duh! 2) The process of ‘changing’ water from gas to liquid releases heat. (Yeah, Science!) 3) The motor generates heat. Three in one – not bad!
Oh, and one more piece of advice, but it will have to wait for next week.