Arohanui!

We have been blessed with two amazing interns for the last two months. John and Amy have gone above and beyond their duties time and again in helping us get this project rolling.

Amy working, John…supervising.


Their help has allowed us to jump ahead on projects we would not have gotten around to for months – pizza oven, brick patio, rocket stove – and complete some essential part of the renovation – hanging plasterboard, finishing the siding, installing guttering.

John and Amy are off this morning for a one month adventure of hitching and hiking around New Zealand. We wish them the best of luck and welcome them back anytime.

Arohanui, Estwing & J.C.

Supermoon

Sorry I have been a little absent here on the old blog. Transitioning back to working 35+ hours a week has been kicking my butt. Yet, it was only a few months ago that I felt trapped by this house project. It was part of every one of my waking moments. Inescapable. Now that my days are spent behind a desk (and in front of groups of kids), I find myself wishing I could spend more time here. Be a larger part of her transformation. Fickle mind… why aren’t you ever satisfied?


I do get two days off every week from bringing home the bacon. And this weekend, after recovering from a mild flu bug, I made some time to take some long-overdue pictures.

I love taking pictures. Every time I pick her up, my camera asks me why its been so long. Here are a few random shots that might give you a bit of a glimpse our life on the day of the autumnal equinox of 2011.

Swimming in a sea of basil.

Heirloom tomatoes the color of the setting sun.

Our half-complete kitchen in the late afternoon sun.

A solar cooker, a patio, and a house the color of the sky.
Cabbage worms are artists too.
Our three girls.

A wall of inspiration.

Go sun go! (That’s celsius, BTW).
Curry, soup, pie, and roasts waiting to jump into our bellies.

Happy equinox. Hope you are feeling balanced and grounded at the start of this new season.

-June Cleverer

Eco, Thrifty…and Beautiful!

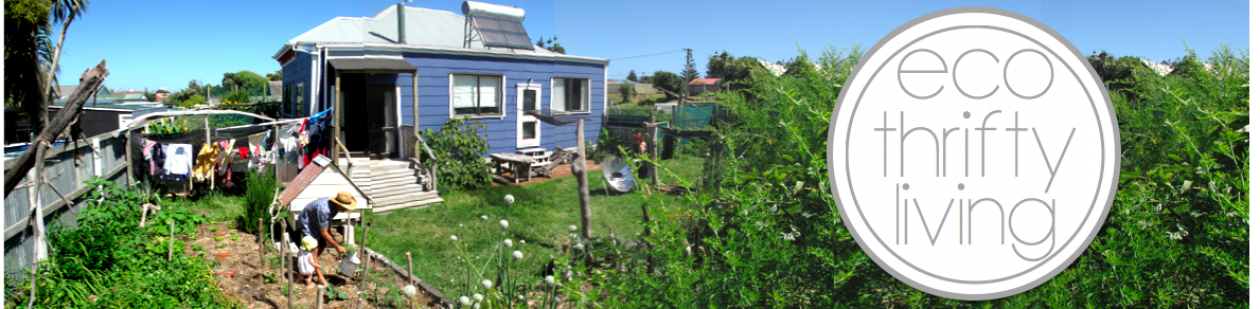
Though we often emphasize designs and decisions that are ecologically-minded and inexpensive, an important part of any design is aesthetics. Permaculture is no different. While striving to make the best use of cheap, abundant and local resources, we also look for ways to make our surroundings attractive, whether they be garden beds, recycled-wood fences, or the latest second-hand purchase from the auction. No one wants to feel like they’re living among a bunch of cast-off junk, and we want to stress that this isn’t what being eco-thrifty means. Careful consideration goes into each project to ensure that it is eco, thrifty, and beautiful.


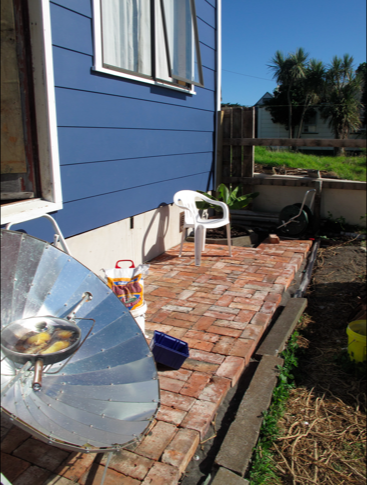
A recent ongoing project that illustrates all three considerations was the installation of a brick patio at the back of the house. The patio has replaced an old, dilapidated deck, which you might remember from our previous post on reuse. It is situated on the north side of the house, where the bricks absorb direct sunlight as well as heat that is re-radiated from the house’s dark-colored exterior. Due to these advantageous heat-retaining qualities, the patio will be a warm spot to enjoy the outdoors during the winter, as well as a suitable site for subtropical plants.


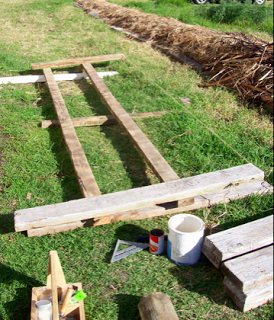
The project actually began when we removed the old deck, which left behind a rubble-and-trash-filled cavity. We salvaged some recyclables and a couple half-buried tarps, then filled in the area with rubble and sand until it was level. Using these materials as fill was an eco-thrifty choice: the rubble was readily available, needed to be disposed of anyway, and provided a clean, bulky fill. The beach sand we used was also a local, plentiful resource, and most of it was diverted from a municipal parking lot cleaning effort. It was going to be taken to the farthest part of town, Aramoho, to be dumped, but we prevented this extra transport and put the sand to good use.


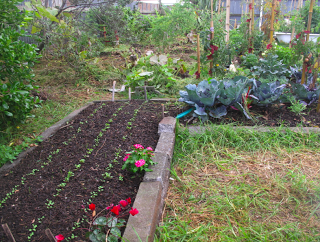
Amidst the sand, we also installed a couple wells for plants, using old concrete edging from TradeMe and some homemade compost. Our banana plant is loving the sunny location.


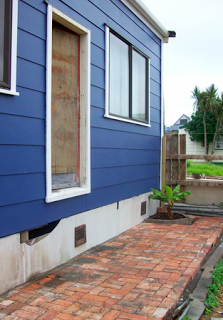
The finished patio, complete with our happy banana.


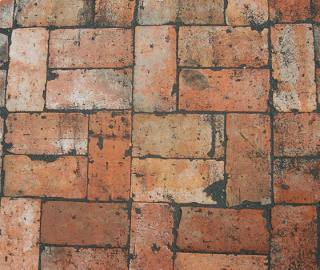
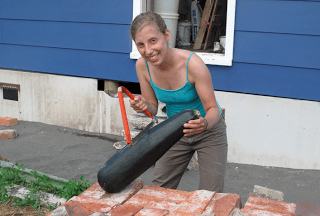
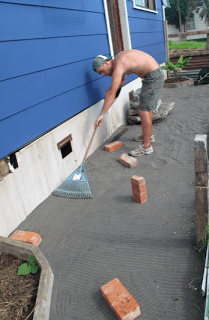
On top of our eco-thrifty base, we laid the final covering of bricks. These were also purchased from TradeMe, allowing us to check “EcoThrifty” off our list yet again. Although these bricks were salvaged, they were still in great condition and only required a bit of scraping to remove some residual mortar. When we laid the patio, we chose a pattern that would interlock for good structure, maneuver attractively around the plant wells, and provide an unusual and pleasing pattern for all to admire. We think the end result is pretty striking, and gives the backyard an inviting and finished quality.


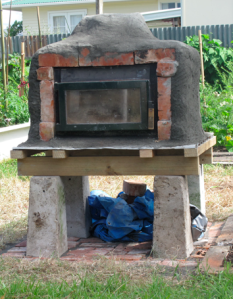
The patio joins the ranks of the pizza oven, that community-building sentinel of eco-thriftiness which I daresay is also quite attractive, and the new but weathered fence. Take a look at the pictures below for more examples of ‘eco-thrifty-beautiful’ that are riddled throughout the house.

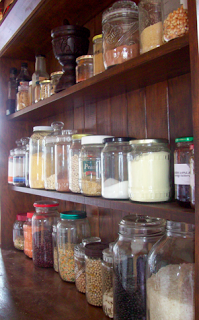
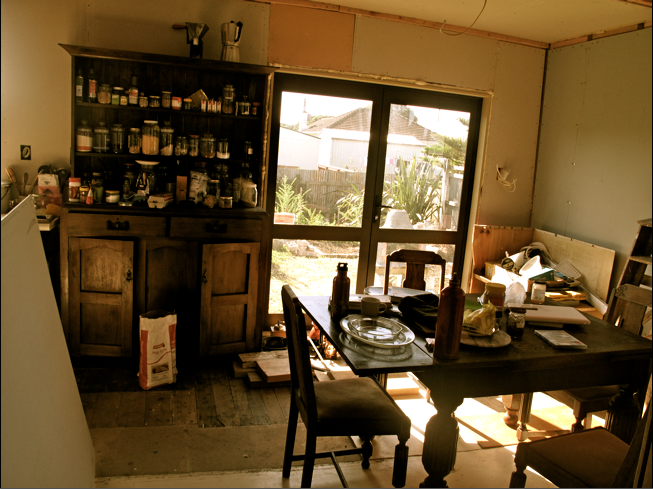
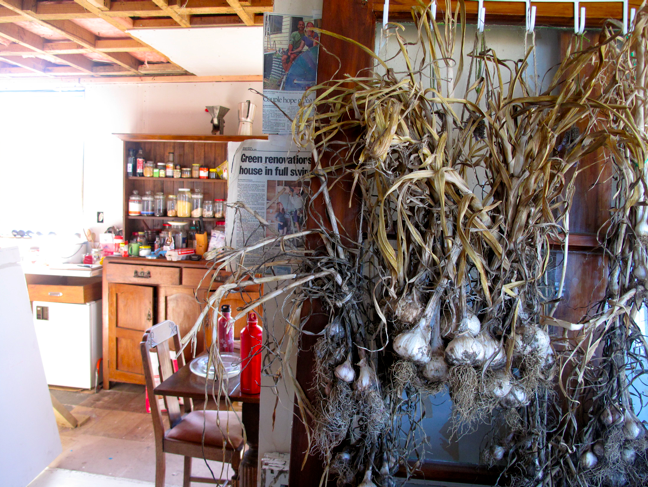
Our secondhand hutch, filled with repurposed jars,
provides a surprisingly beautiful way to store dry goods.

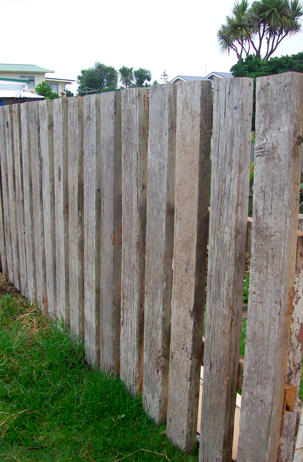
An old, unusable deck means a nice weathered fence.

Symmetry, convenience, and rustic beauty.

Cheers!


– A. Lamb Down Under

10 Watt Pasta

We ran a new workshop this weekend with excellent response from participants. The workshop – Solar and Energy-Efficient Cooking – is part of an ongoing workshop series by The ECO School.

We covered a number of different solar cooker designs and cooking techniques during the first half of the workshop. But for those who have not yet made their own cooker, or for cloudy days, we introduced a number of other energy-efficient cooking techniques. Central to many of those techniques is the straw box.


Our straw box happens to be full of towels, not straw. But we still call it a straw box. The key to a good straw box in insulation on all 6 sides.

A great example of using a straw box – not to mention an excellent energy-saving cooking technique – is what we call “10 watt pasta.” This cooking technique uses a small fraction of the electricity of boiling pasta for 10 minutes on a hob (stovetop). Here’s how to make it.

1) Boil a jug. Because the heating element is inside of the container, heat transfer is more efficient than heating a kettle or sauce pan of water on the stovetop (hob). We fill the jug with our solar hot water which comes from the tap at a high temperature using no electricity.


2) Pour over pasta until covered and place in the straw box.


3) Cover the straw box and wait 20 – 25 minutes. Stir once at 10 to 12 minutes. For al dente pasta, remove at 15 minutes and stir at 8 to 10 minutes.


The pasta comes out perfectly cooked as long as you drain the water at the prescribed times. Use the intervening 25 minutes to make a healthy sauce from fresh veggies and herbs from your garden.

Bon apetito! Estwing

Fossil Fuel Free

As the sound of lawn mowers ringing out across neighborhoods wanes in the southern hemisphere and waxes in the northern, I cannot help but to ask…why?


Why burn limited fossil fuels manicuring a show piece?

Why buy and maintain an expensive, loud, polluting machine?

Why pay $2.10 per litre ($3.60 per gallon in the US) to run that machine?

Why contribute further carbon dioxide to an already overwhelmed atmosphere?

Why spend hours on land care that yields no food?

Problems: Global food prices are at a record high and rising. Oil has been above $100 per barrel for weeks and rose $3 today on increased concerns on the Middle East and North Africa.

Solution: Being “eco-thrifty” means going green and saving money. We use no oil to maintain our 700 square meter section using the following low-maintenance/high productivity techniques.

Growing Food

Once a weedy lawn, now a productive garden and burgeoning food forest.

Tractoring Ducks

Ducks eat grass and turn it into eggs, flesh and fertilizer.

Scything

Interns Amy and John learning how to harvest carbon-neutral mulch.

Please people. Stop the mowing madness! For the good of your wallet and the planet.

Peace, Estwing

Intern Appreciation

As they enter their last month of internship with the ECO School, we’d like to express our appreciation for the help that John and Amy have provided the Eco-Thrifty Renovation Project. To celebrate their efforts, we’re holding a bit of a caption contest. If you have a gmail account, please write your caption in the comment section below. If you don’t, you can send a caption to theecoschool@gmail.com and we’ll post it.
Peace, Estwing
Amy Lamb, AKA ‘A. Lamb Down Under’


John Wright, AKA ‘John the Intern’

A Compost Tea for Plants

Aerated compost tea is becoming increasingly popular within organic gardening circles, yet producing such teas still remains a mystery to many. Here at the Eco School we decided to take on the challenge of brewing up a simple aerated tea as a way of adding beneficial microorganisms to the plants and the soil. We began our experiment with a 15 liter plastic bucket and an old fish tank air pump. In the bucket we suspended two cups of compost rapped in a loose-weave cloth and placed the aerator tubes at the bottom. The bucket was then filled with chlorine-free water. We set the tea outside with the aeration on for twenty four hours.

The number of aerobic microbes in the tea grows exponentially, reaching a peak in population in twenty-four hours. We used the tea immediately at full strength in our watering can to foliar feed the plants and inoculate the soil with microorganisms.

Commercial compost tea producers rely on laboratories to check for the proper numbers and types of microorganisms they have in their tea. We are going to rely on some well-made compost and a little luck. I have attached additional links for more reading about aerated compost teas below.

http://www.simplegiftsfarm.com/compost-tea.html

http://www.compostjunkie.com/compost-tea-recipe.html

http://www.soilfoodweb.co.nz/index.php?option=com_content&view=article&id=78&Itemid=56

Good Fences Make Good Interns


Reusing items normally destined for the recycling center is something I have always been fond of. There is something satisfying about repurposing, say, a cardboard container that once held Brie cheese, into a pretty box for presenting a gift of Christmas chocolates. Until the advent of my experience here in New Zealand, this was basically the extent of my creative repurposing: pretty small-scale. At the ECO School, though, our projects involve reusing materials on a large scale.

My first major recycling project also coincided with my first demolition experience. There used to be a raised deck extending along the entire front of the house, but several holes rendered it unsafe to use. So, we got to work with pry bars and disassembled the entire thing. The wood, though weathered and rotten in a couple spots, was saved for reuse in projects where structural strength wasn’t a primary concern. It was neatly stacked in a corner if the yard, as well as the recesses of my mind…

Then, this Tuesday, I had the opportunity to undertake my first solo construction project: building a fence. This wouldn’t be just any fence, though: it would be a permaculture fence, serving multiple functions. First, it would allow our duckies to roam free in the yard, fertilizing and eating bugs. It would also serve to keep neighborhood dogs out. Finally, it would serve as a trellis for climbing plants like passionfruit, and its north-facing orientation would provide them the direct sunlight they need. This project was also a perfect reuse of the wood we’d saved from the deck demo, as it had an appealing weathered look and was sound enough to make sturdy fence pickets.

The new fence was to be attached to an existing post buried on the property, but upon investigation (read: John digging himself into a meter-deep hole), we found that this post was not only slanted, but also broken deep in the ground. We decided to replace this post with another reclaimed pile, and saved the broken post for another incarnation. Taking this extra step would ensure the integrity and longevity of our system, important considerations in permaculture designs.

A new post is installed


Now, let’s talk about building this thing. First, we measured approximately how long the fence would be, and compared this to the wood we had available to use as rails. From these rails, which were the somewhat rotted supports of the old deck, we cut the longest possible sections of sound wood. Although they weren’t the perfect length, they were very close, and we decided we could make up for a shortfall later when we built the gate.


Rails are aligned and ready for pickets


Close-up of the string level

Next, I took the two rails and secured them to a board at either end, ensuring they were equidistant and parallel, as well as creating a stable surface for attaching the remaining pickets. We ran a string between the tops of the two end boards so that we could easily keep the top line of the pickets level. Then I got to work predrilling holes in the old deck planks which were to become the fence pickets. Securing each vertical board with four nails, two in each of the two rails, would keep the fence square and prevent shifting from side to side. So, I spent the next few hours in a Karate Kid-style fence project, but instead of perfecting my painting skills, I became learned in the ways of using hammer and nail.


Tools of the trade


Visible progress

When my creation was finally complete, I paused to admire my handiwork, then elisted the help of the menfolk to put that beast of a fence in its final location. At one end, we secured it to the new sturdy pile we’d buried in the ground. And the old post we removed? We cut off the broken section, buried it and used it for a support it at the other end of the fence, giving it new life.

By the end of the project, everything had come full circle: a deck had become a fence, and I’d completed my first demolition and construction projects. We’d kept heaps of materials on-site, and added a variety of functions and values to the yard. A permaculture lesson was complete, though I suspect that future improvements will carry the lesson further.


~ A. Lamb Down Under

Going Bananas

Thanks to our friends Hadi, Tim and Clare, a tropical paradise is taking shape at 10 Arawa Place.

Part of our permaculture design includes a ‘sun trap’ and ‘heat sink’ along the northwest corner of the house. A combination of strategies will allow for conditions suitable to grow bananas at latitude 40 degrees South.

After interns John and Amy helped take down the old deck (to be rebuilt into a fence – blog post pending), we filled the trench with rubble and sand in preparation for a brick patio. Simultaneously we built two planting wells using some concrete retainers we bought on Trade Me. The wells are 600 mm deep (2 feet) and filled with compost.

We’ll add the bricks later which will act as a heat sink – moderating daytime temperatures and holding off frost during winter nights.

Painting the house a dark color and adding a fence to protect against strong winds from the West will provide the other elements for our tropical corner with Bananas and passion fruits which came as gifts from Hadi, TIm and Clare.

Fruits planted since October: apple, fig, peach, plum, banana, passion fruit, loquat, guava. Pending: feijoa, blueberry, strawberry, raspberry, lemon, lemonade.

Yum, Estwing