The Principles of Pizzaculture


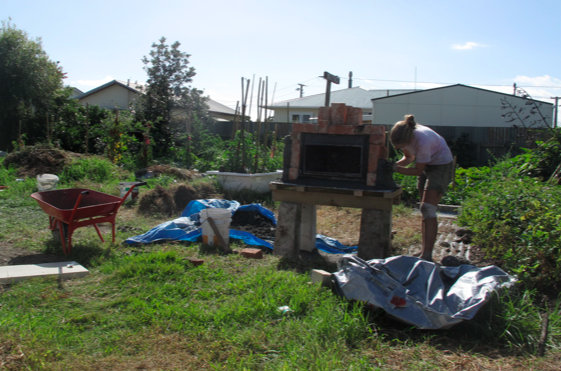
As many of you read about in John the Intern’s recent post, we recently constructed a pizza oven from start to finish in our backyard. After taking some time to reflect on the process of making and using the oven, it occurred to me that it embodies many of the permaculture design principles . From the gathering of materials to the process of building it, to finally using the pizza oven for entertaining, I saw permaculture everywhere. Let me take you on a tour of the principles behind this backyard permaculture sentinel.


1. Observe and Interact

This principle is the foundation of permaculture theory: observing nature’s patterns and applying them to benefit both human and natural systems is key to living sustainably and in concert with our environment.


The four of us here in Wanganui have had the opportunity to meet, and thus observe and interact with, many fellow permaculturists. As such, we discovered that to be a true “permie,” one should have a backyard earth oven, preferably constructed by oneself or with a group of permie friends. Joking aside, we noticed that having a pizza oven could create an opportunity for social interaction in our community. Besides, how cool would it be to have your own handmade pizza oven?


2. Value the Marginal

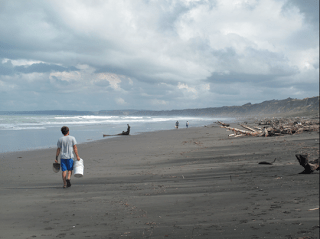
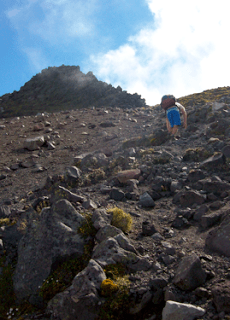
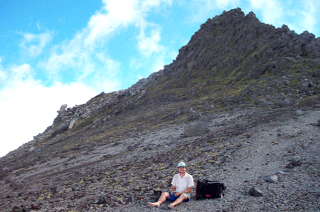
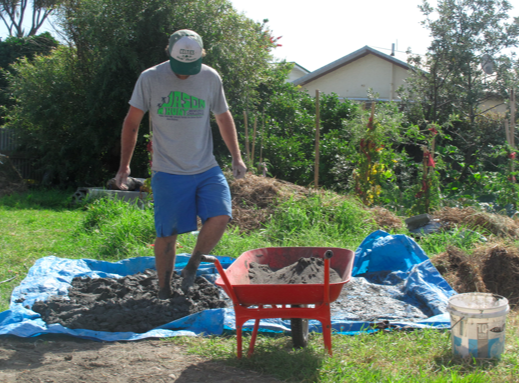
This principle manifested itself many times throughout the construction stages of the project. Interpreted variably, “marginal” can mean the literal margin where two ecosystems meet, such as the land and the sea. This area, aka the beach, was a useful source of materials. Beach sand and clay were the two main components of the cob material that surrounds the oven.


Being an intern is hard work.


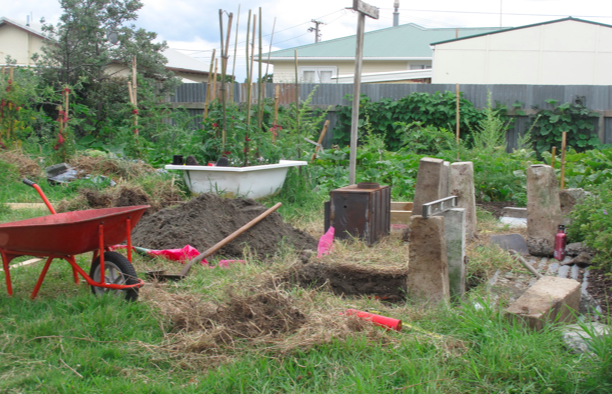
Our yard had also become a marginal area, as an abandoned lot bordered by neighbors looking for a cheap and easy way to get rid of unwanted items. Luckily for us, we saw opportunity where others saw junk, and were able to source our concrete support posts, as well as the roofing iron and scrap wood for the oven’s base, all from extra stuff we had around the property.


Concrete piles found nestled in the harakeke.


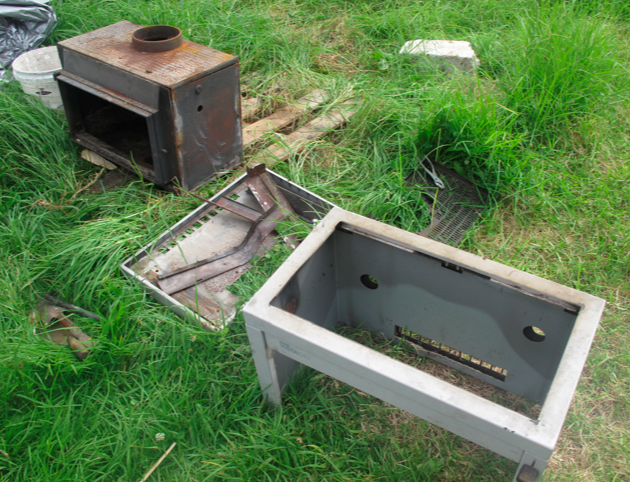
Finally, a couple items we used had been purchased from TradeMe, a site that gives “marginal” or unwanted items new life by transferring them to people who can use them. This was how we came to own the bricks and woodburner oven used in our project.


3. Catch and Store Energy

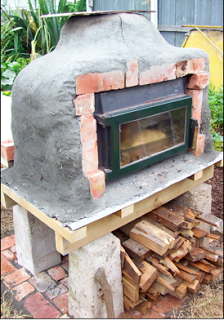
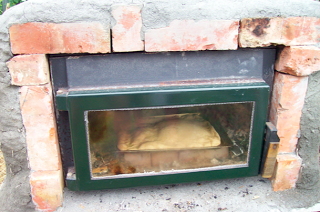
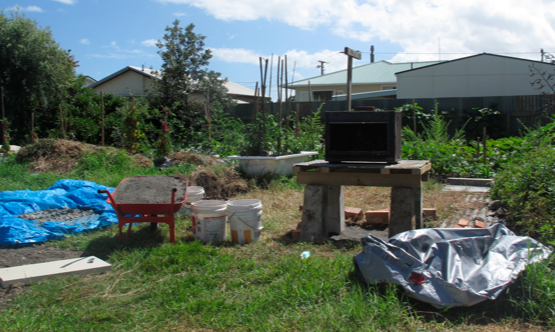
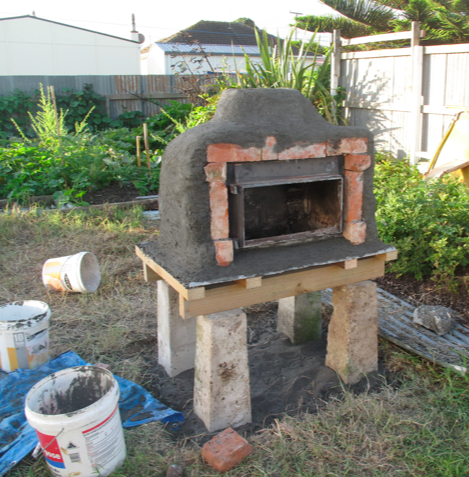
This principle is about efficiency, a design concern we considered frequently in the making of our oven. Using an existing metal oven as a base gave us a leg up by providing an enclosed space to house the fire. We improved it further by lining the inside bottom with bricks, which hold and slowly release heat for cooking even after the wood coals have been removed. The outside of the oven was also surrounded with brick to further increase insulation before the earthen covering was finally applied. In the future, we hope to make the chimney smaller to improve heat retention.


Interior bricks, the metal oven, exterior bricks, and the earthen layer work to retain heat.


4. Apply Self-Regulation & Accept Feedback

As with any project undertaken with minimal experience, this was a learning process involving lots of trial and error. I, for one, learned that I had insufficient arm strength to carry two 10-liter buckets of clay down long stretches of beach, no matter how I tried to carry them, and finally edited my load accordingly. The first time we used the oven, we tried making a stack of raw crusts and pre-baking them before the party to reduce cooking time and wait time later on. Unfortunately, the crusts all stuck together and turned out to be too thick, so we decided instead to make thin crusts on demand that could cook more quickly, and placed pizzas on top of the chimney for precooking before they went in the oven.


5. Multiple Functions

The pizza oven, as we call it, is more than just that. In addition to baking pizzas, we simultaneously sauteed peppers and onions in a cast iron pan underneath the pizza pan, pre-warmed pizzas over the chimney, and used coals removed from the oven to grill sausages on the side. In permaculture, every element of a design should serve multiple purposes. Our four-uses-in-one pizza oven? Check. Every function should also serve multiple elements. For example, placing the “on deck” pizzas over the chimney not only pre-heated them, but removed them from the work surface, put them in a convenient place for he-who-manned-the-oven, and reduced heat loss from the chimney.


The chimney pre-warms the pizza, the oven cooks pizzas and sautes veggies, and the grill waits for sausages.


6. Integrate, Not Segregate

The pizza oven was the life of the party. By combining the tasks of cooking and eating, the oven took the pressure off the hosts and gave their guests a fun activity to engage in. The project itself was also quite a conversation starter.


To help you start your own party, here’s a pizza crust recipe to try, in whatever oven you may have. If you’re really inspired, check out John the Intern’s post and try your hand at making your own pizza oven! It’s a permaculturist’s dream.


Pizza Dough (Adapted from Mollie Katzen’s Moosewood Cookbook)


1 C very warm water

1 1/2 tsp yeast

1 T honey

1 1/2 tsp salt

2 1/2 – 3 C flour (we used half white, half whole wheat)


1. Combine water, yeast and honey; stir to dissolve.

2. Stir in salt and flour, mixing with hands when stirring becomes difficult. Knead in the bowl for 5 minutes.

3. Brush with olive oil, cover with a towel, and let rise in a warm place at least an hour. (We let it sit overnight.)

4. Punch down dough. Divide and press/roll out to desired crust sizes. (Note: This crust leans to the thicker side, so if you like thin crust, don’t be afraid to really roll it out.)

5. For thinner crusts, add toppings to raw crust and bake. For thicker crusts, pre-bake a few minutes, then add toppings and return to oven.


Bon Appetit!


– A. Lamb Down Under


Taranaki: a Tramp of Trials and Truimphs


Although us interns are eager learners and hard workers, occasionally we do enjoy a trip off the old Castlecliff block. A few weeks ago, John the Intern and I decided to engage in our first real Kiwi travel adventure, a trek around New Zealand’s most-climbed mountain, Mt. Taranaki. We chose to follow the upper-level circuit, a route that circumnavigates the volcano through alpine meadows and scrubby ridges, as well as temperate rainforest, flooded gorges and gravelly slips.
The four-day adventure began with a hitchhike out of Wanganui. After putting our best thumbs forward for 45 minutes, we finally secured a ride. Our hitch was a very enthusiastic man, an off-duty truck driver that loved racing down the winding country roads at 120 kph. After bringing us to his daughter’s house for a cup of coffee, he insisted on delivering us straight to the trailhead. Unfortunately, he did not have the best grasp of the area, and we ended up missing our turn several times and driving a complete loop around the mountain; we didn’t get on the trail until 2:30 pm. To top it all off, we ended at the wrong visitor’s center, and since it was a Tuesday, it was closed and we were unable to secure ourselves a map. Instead we sketched a rough one of our own on a scrap of paper borrowed from the visitor sign-in log.


Since our drop-off landed us a couple hours further from our destination hut, we started strong and booked it toward Holly Hut. It was quite hard to judge our position relative to the hut, as two signs that were an hour’s worth of hiking apart both reported the hut as being 3.5 hours away. We finally rolled in around 8:15 pm, with very little remaining daylight. A nice Belgian couple greeted us, and we discussed our respective trips, made dinner, and went to bed.


The next day we had a bit of rain, meaning soggy shoes and clammy clothes. However, we saw some incredible temperate rainforest and gained some decent altitude, and the warm crackle of a wood fire that welcomed us at our second hut made it all worth it. The man who made the fire also greeted us, standing naked in front of the hut when we arrived! His name was Mario, a native Austrian turned German army man who claimed to beat all the estimated hiking times on his map by two hours. Waiaua Hut had a great view of a gorge below, and afforded us a restful night’s sleep and the opportunity to dry our gear before completing our circumnavigation of Mt. Taranaki.

The third day started with a rapid ascent to a narrow ridge: it was just wide enough to house the trail with a tree on either side, and sloped abruptly to oblivion just beyond. We continued to climb on hands and feet, onward and upward, as my calf muscle conveniently deciding to start seizing up.


Nevertheless, we continued onward, and decided to make the quick jaunt up Fantham’s Peak and stop for lunch at the summit. Let me tell you, this was the hardest I have ever worked for lunch in my life. Mario was quite ill-informed when he estimated that the trek would take about 20 minutes; I guess the trail maps warn “not to scale; not to be used for navigation purposes” for a reason. After a long set of wooden steps that I affectionately look back on as the Stairway to Hell, the trail became a field of volcanic gravel, or scree, situated on a 45-degree or steeper incline. My chosen method of ascent was to take two steps up, slide back one, complain, take a deep breath, and repeat. John fared quite a bit better, scrambling steadily up and patiently waiting for me at the trail posts and boulders where it was safe to rest.


We finally arrived at the top of the major rise, and mutually decided that was a sufficient stopping point. To our left rose the much higher peak of Taranaki, whose presence demanded ever more respect after the comparatively minor ordeal we just endured. In of us stretched a blanket of billowy clouds and the farm country below, and behind us was a rocky ridge of what looked like jagged teeth. We had run out of water and decided not to continue on, but we found out later that just a little farther on, at the true summit, was a hut! Anyway, we finished the third day as we descended down to Dawson Falls once again.


We had completed our loop in three days, while most people take 4-5. We camped out the third night, and finished off the final day by hiking over to North Egmont (the British name for the mountain) Center for a hitch home. When we came to the sign for the Taranaki Summit Track, we decided somewhat disappointedly that there wasn’t time, or the wherewithal in my left calf and knee, to make it to the top and back in time for a hitch home. However, with all things considered, it was quite a successful feat. The rewards far outweighed the trials, and primed us for further tramping adventures in the coming months.


– A. Lamb Down Under

Local Currency Rocks!

Over the past few months the global economy has ridden a roller coaster ride of spiking and easing prices on everything from oil, to currencies, food commodities. While this has led to lack of confidence in major economic systems, it has also led to rising interest in Local Exchange and Barter Systems and Alternative Currencies.

We are fortunate here in Wanganui to have a local currency system in place. Our local currency is called the River Exchange and Barter System, or REBS for short. Our network is made up of 162 members who offer a wide range of services, from childcare to gardening to electrical work. The network averages over $3,000 worth of trades per month with over $200,000 in trades occurring since the system’s birth.

Local currency is one key way of building resiliency in a community. It helps community members realize the wealth of services available locally, and also helps identify community weaknesses. We seem to have a glut of gardeners in our system, but no plumbers. We work hard to support the REBS system by allowing our workshops to be paid for in REBS and using those REBS to then buy food and other goods at the market. It is a definite win-win.

I thought I might give a glimpse at some recent news stories that centre on alternative currencies and local exchange and barter systems.

Here’s one from the New York Times:

Amid Recession, A Return To Bartering
The New York Times – December 8, 2010.
“The concept of bartering often conjures an aura of myth: Jack’s storied magic beans,… [but] in the wake of the recession, bartering has captured a renewed interest among the cash-strapped or habitually thrifty… The hope is that not only will people benefit from an experience achieved through cashless means, but that they’ll also widen their career circles as well.”

And another from the U.S.:

Slow Money’s Gaining Momentum
The Concord Patch – February 1, 2011,
“Imagine if you could buy a cup of coffee from Starbucks in your town at a discount with local community money…The concept of local dollars isn’t new and was used briefly during the depression to stimulate spending in local communities. Slow Money, founded by Woody Tausch, is modeled on the 20-year old slow food movement and promotes investing in small food enterprises and local food systems.It also focuses on connecting investors to their local economies…”

And here’s one from across the pond:

Totnes: Britain’s town of the future
The Guardian – Sunday 6 February 2011
“Totnes in Devon might be the most forward-thinking eco settlement in the world. As fossil-fuel reserves dwindle and the economy contracts, will resident-led Transition Towns become the way that we all live?
…A local currency is central to the Transition plan. ‘Think of a leaky bucket,…any time we spend money with a business that’s got more links outside the community than in it, we leak money from the local economy. What local currency does is allow that wealth to bounce around in that bucket.’ “

And talk of a regional currency right here in Austral-asia. Not quite an alternative currency, but interesting nonetheless:

Businesses keen on common economic zone
“Many New Zealand businesses think the idea of a trans-Tasman currency and economic zone is hot… MYOB’s business monitor surveyed over 1000 local businesses on possible policies ahead of this year’s election and the concept of a common economic zone and currency with Australia garnered one of the most surprising responses…Forty-two per cent of Kiwi business owners surveyed were in favour of the concept”

And finally the local currency system developed by some creative youths in the U.K.:

Fruit is becoming ‘alternative currency’ in youth prison

The Independent – Monday, 31 January 2011,
“Children in young offender institutions in England and Wales are often given poor-quality food, leaving some so desperate for healthy meals that fruit has become an alternative currency in one prison…Young offenders are able to purchase additional food, including bags of fruit, from prison shops… Some boys bulk-buy fruit and exchange it for phone cards.”

Perhaps the end of summer is not the time to set up a fruit-based exchange system, with peaches and nectarines in surplus right now. But during the winter I could see this currency rivaling REBS in value. Happy Trading!

@font-face { font-family: “Times New Roman”; }@font-face { font-family: “Arial”; }p.MsoNormal, li.MsoNormal, div.MsoNormal { margin: 0in 0in 0.0001pt; font-size: 12pt; font-family: “Times New Roman”; }h2 { margin: 12pt 0in 3pt; page-break-after: avoid; font-size: 14pt; font-family: Arial; font-style: italic; }a:link, span.MsoHyperlink { color: blue; text-decoration: underline; }a:visited, span.MsoHyperlinkFollowed { color: purple; text-decoration: underline; }table.MsoNormalTable { font-size: 10pt; font-family: “Times New Roman”; }div.Section1 { page: Section1; 

Tubbin’ Tomatoes Update

Well the water excess water has drained out of the bathtub and the tomatoes are rocking along. It is amazing to see plants we thought might not make it spring back to life. We used bamboo split into quarters as stakes. Currently, these tomatoes are looking like they are going to be some of our most productive plants. Interestingly enough, one of Nelson’s composting experiments seems to have emerged from the flooded tub… Are those the boots of the intern that went missing?!
-John the Intern

One Part Clay Three Parts Sand… Oh Yeah, and a Wood Burner.

The coveted backyard oven completes any permaculurist’s garden much like a gazing ball counters the bleakness of a properly manicured lawn. The oven melds the flavors of a garden the same way a gazing ball reflects the finely shorn grass upon which it sits. Crisp and defined, preferably with a thin crust and lots of cheese.

Designing one of these creations is a contentious and debated topic, much like choosing the color of your gazing ball. Blue or green? In either case, neither ornament is completely permanent. I like to keep a large selection of colors in my garage to reflect the type of day I am having. In the case of the oven, none of the materials are permanently fixed, so they are quite easy to take apart and rebuild should problems arise. This being said, we built a permanent base to hold the weight of the oven and any future modifications. It is important to choose a location that fits the site. Our oven is located far enough away from the house avoid smoke sparks becoming a hazard to anyone inside, yet close enough to the kitchen door to provide easy access to a cook carrying food to and from the house. We also faced the oven door away from the prevailing winds so the oven will not lose too much heat when the door is opened.

We began building by excavating the lawn under the oven. Then four concrete posts, scavenged from a pile left in the back corner of the lot, were placed into the excavated rectangle, squared up, and leveled.
On top of the posts, we placed a frame of treated wood, covered with a sheet of old roofing iron. Many people build foundations out of stone or bricks to resist heat and insulate the oven. So far the wood frame has held up fine, and the space under the oven is a great place to store wood, fire tools, and a tarp to keep the rain off. After making the frame, we were ready to begin creating the oven.My quick Google search led me to the conclusion that earth oven construction seems to be plagued by many ailments. Cracking and collapse are common, and problems that affect one builder do not affect another. Also, it is difficult to find a standard mud recipe, let alone recommended shapes and dimensions. In our search to find the perfect design, we decided to use an old wood burner as an interior frame for the oven. Although boxy, the iron structure provided a solid the frame that mud lacks, including a tight fitting door for efficiency. The wood burner required that the exterior paneling and air intake be stripped off before the iron firebox could be used.
The firebox was set into a layer of mud on top of the iron, stabilizing and insulating the box from the bottom. The firebox was then surrounded by a layer of bricks to provide thermal mass.
Two layers of mud were placed around the bricks. This layer held everything together and insulated the bricks and firebox. The first layer of mud we decided to use was a mixture of three parts sand to one part clay with a small amount of chopped straw added to form a cob mixture. We mixed the mud with our feet in a tarp, adding water until the mud reached a formable consistency and could still hold its shape.
The first layer of mud was formed into soft cubes about 100mm wide and stacked tightly around the bricks. We tried to apply the mud evenly around the oven, allowing areas to set up a little before continuing to build upward. We surrounded the entire oven with this layer except for the front, to allow the door to function properly.
The second layer of mud was made up of three parts sand to one part clay, with a lot more water added to form a plaster-like consistency. This layer was applied in a 20mm think layer over the first, to even the first layer and provide a smooth, aesthetically pleasing finish.
At this point the oven was smoothed over with a trowel, covered with a tarp, and allowed to dry slowly over the next three days.
By Saturday, the oven was dry enough to start a small fire in the morning to finish the drying process. After some time, we added more wood to heat the oven up for pizzas in the afternoon. Everything seemed to work fine.
We saved some mud mix from the main part of the build to repair a few cracks as well as build the chimney a little taller and reduce its diameter.

Happy Eating!
-John the Intern